Posts tagged Process
Switching the Subject

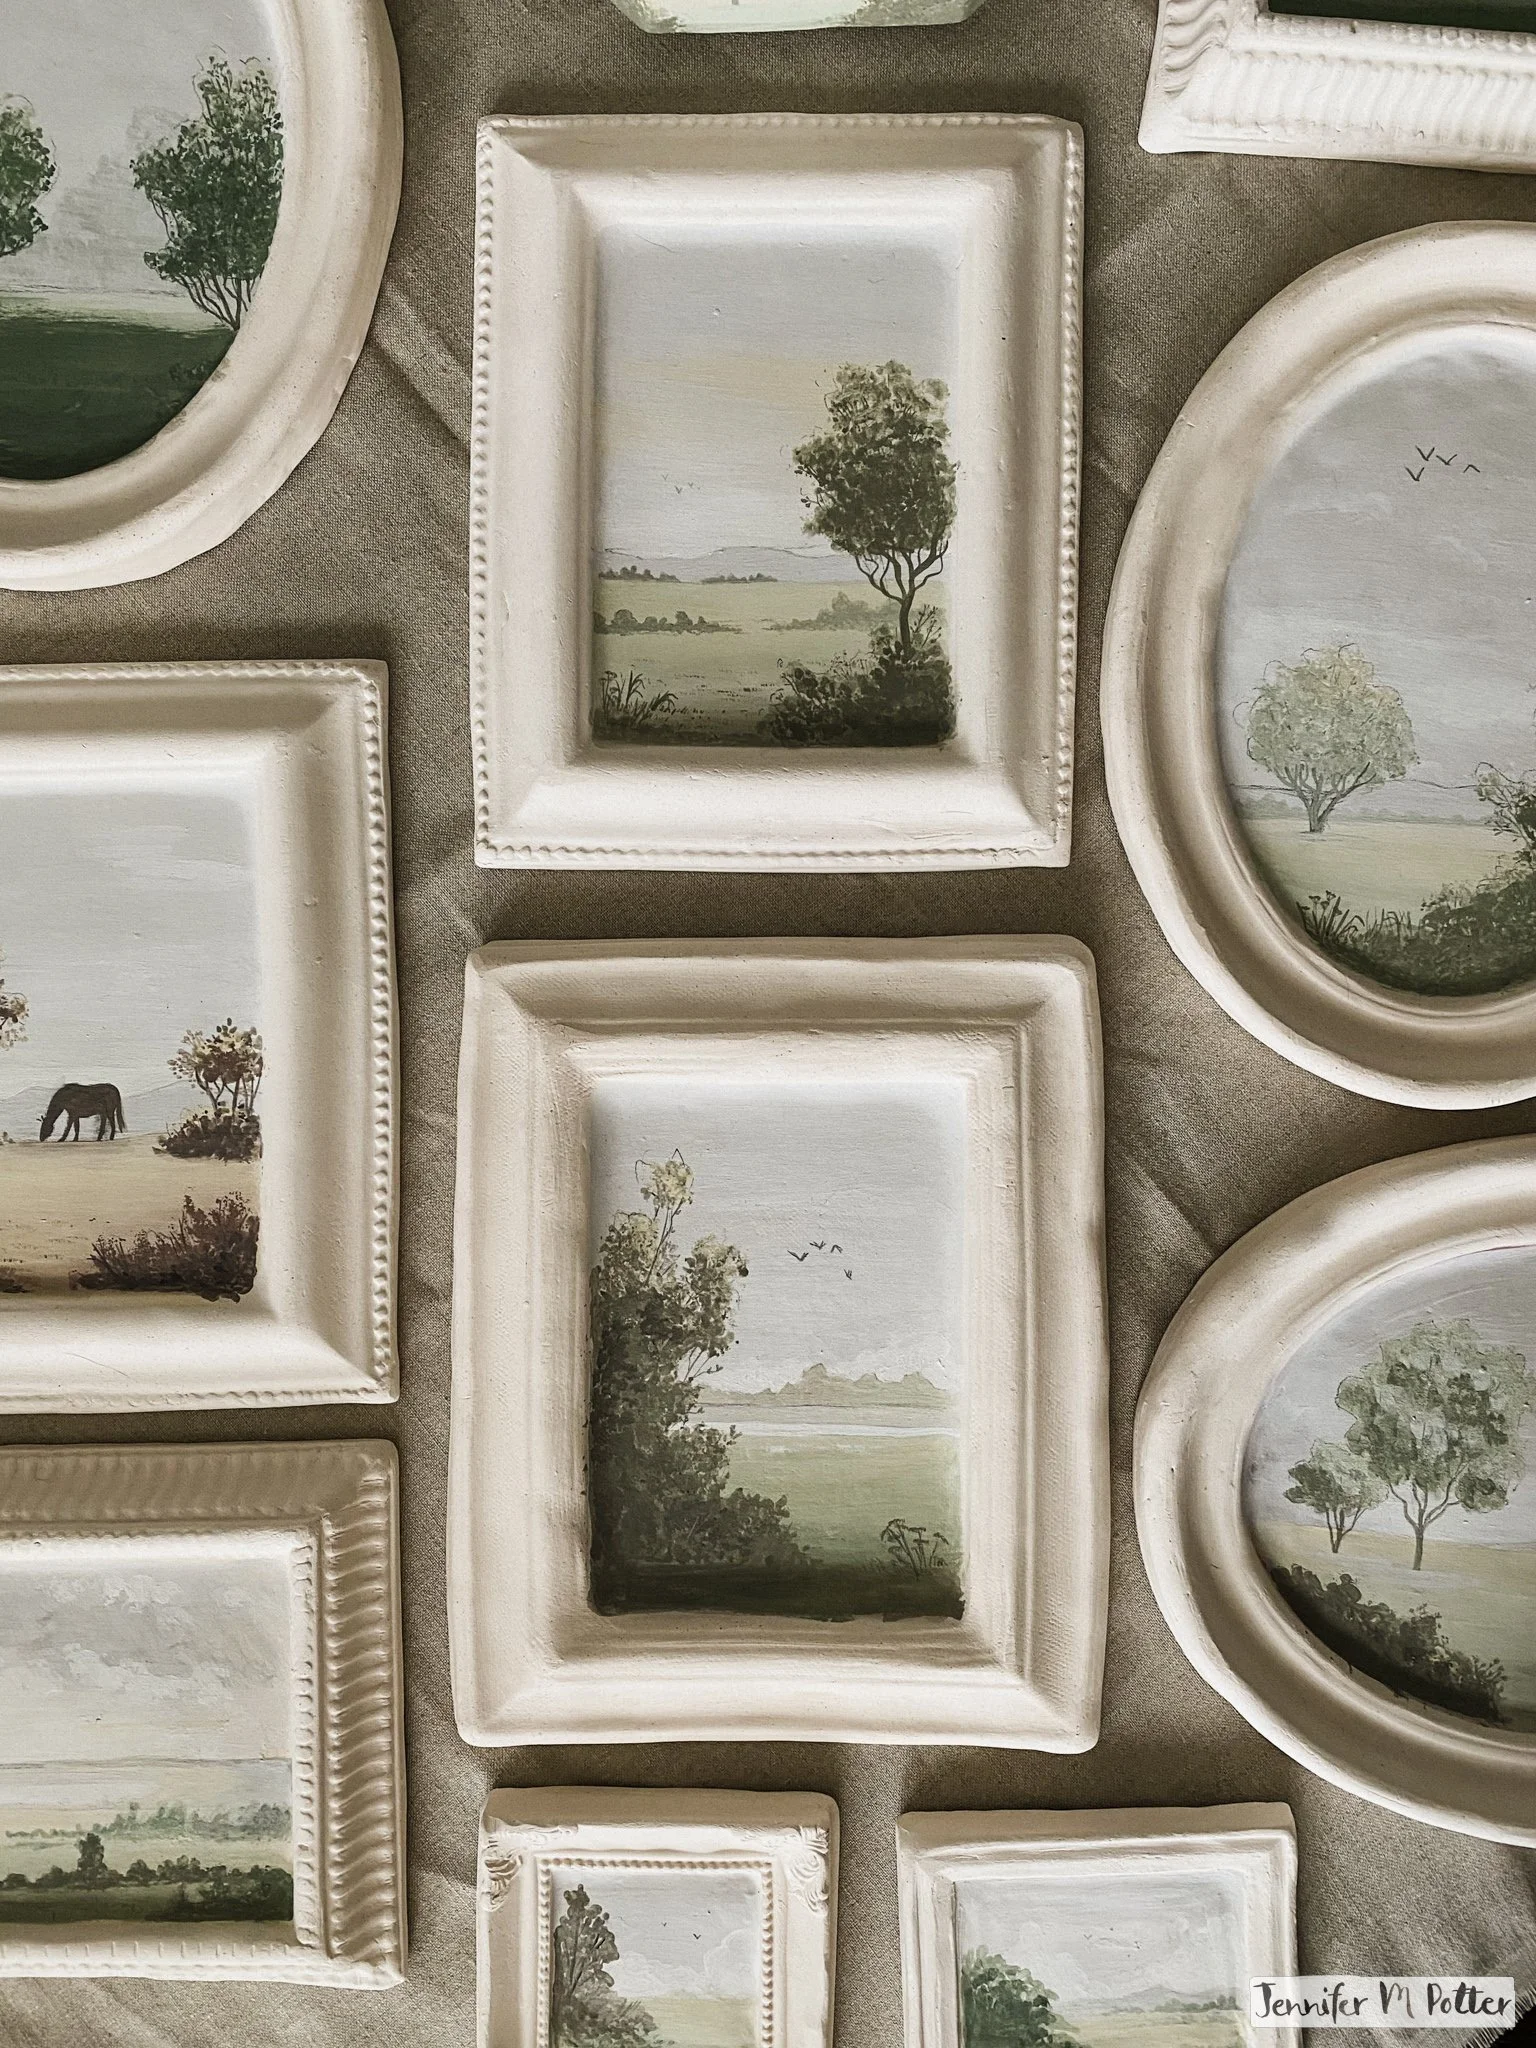
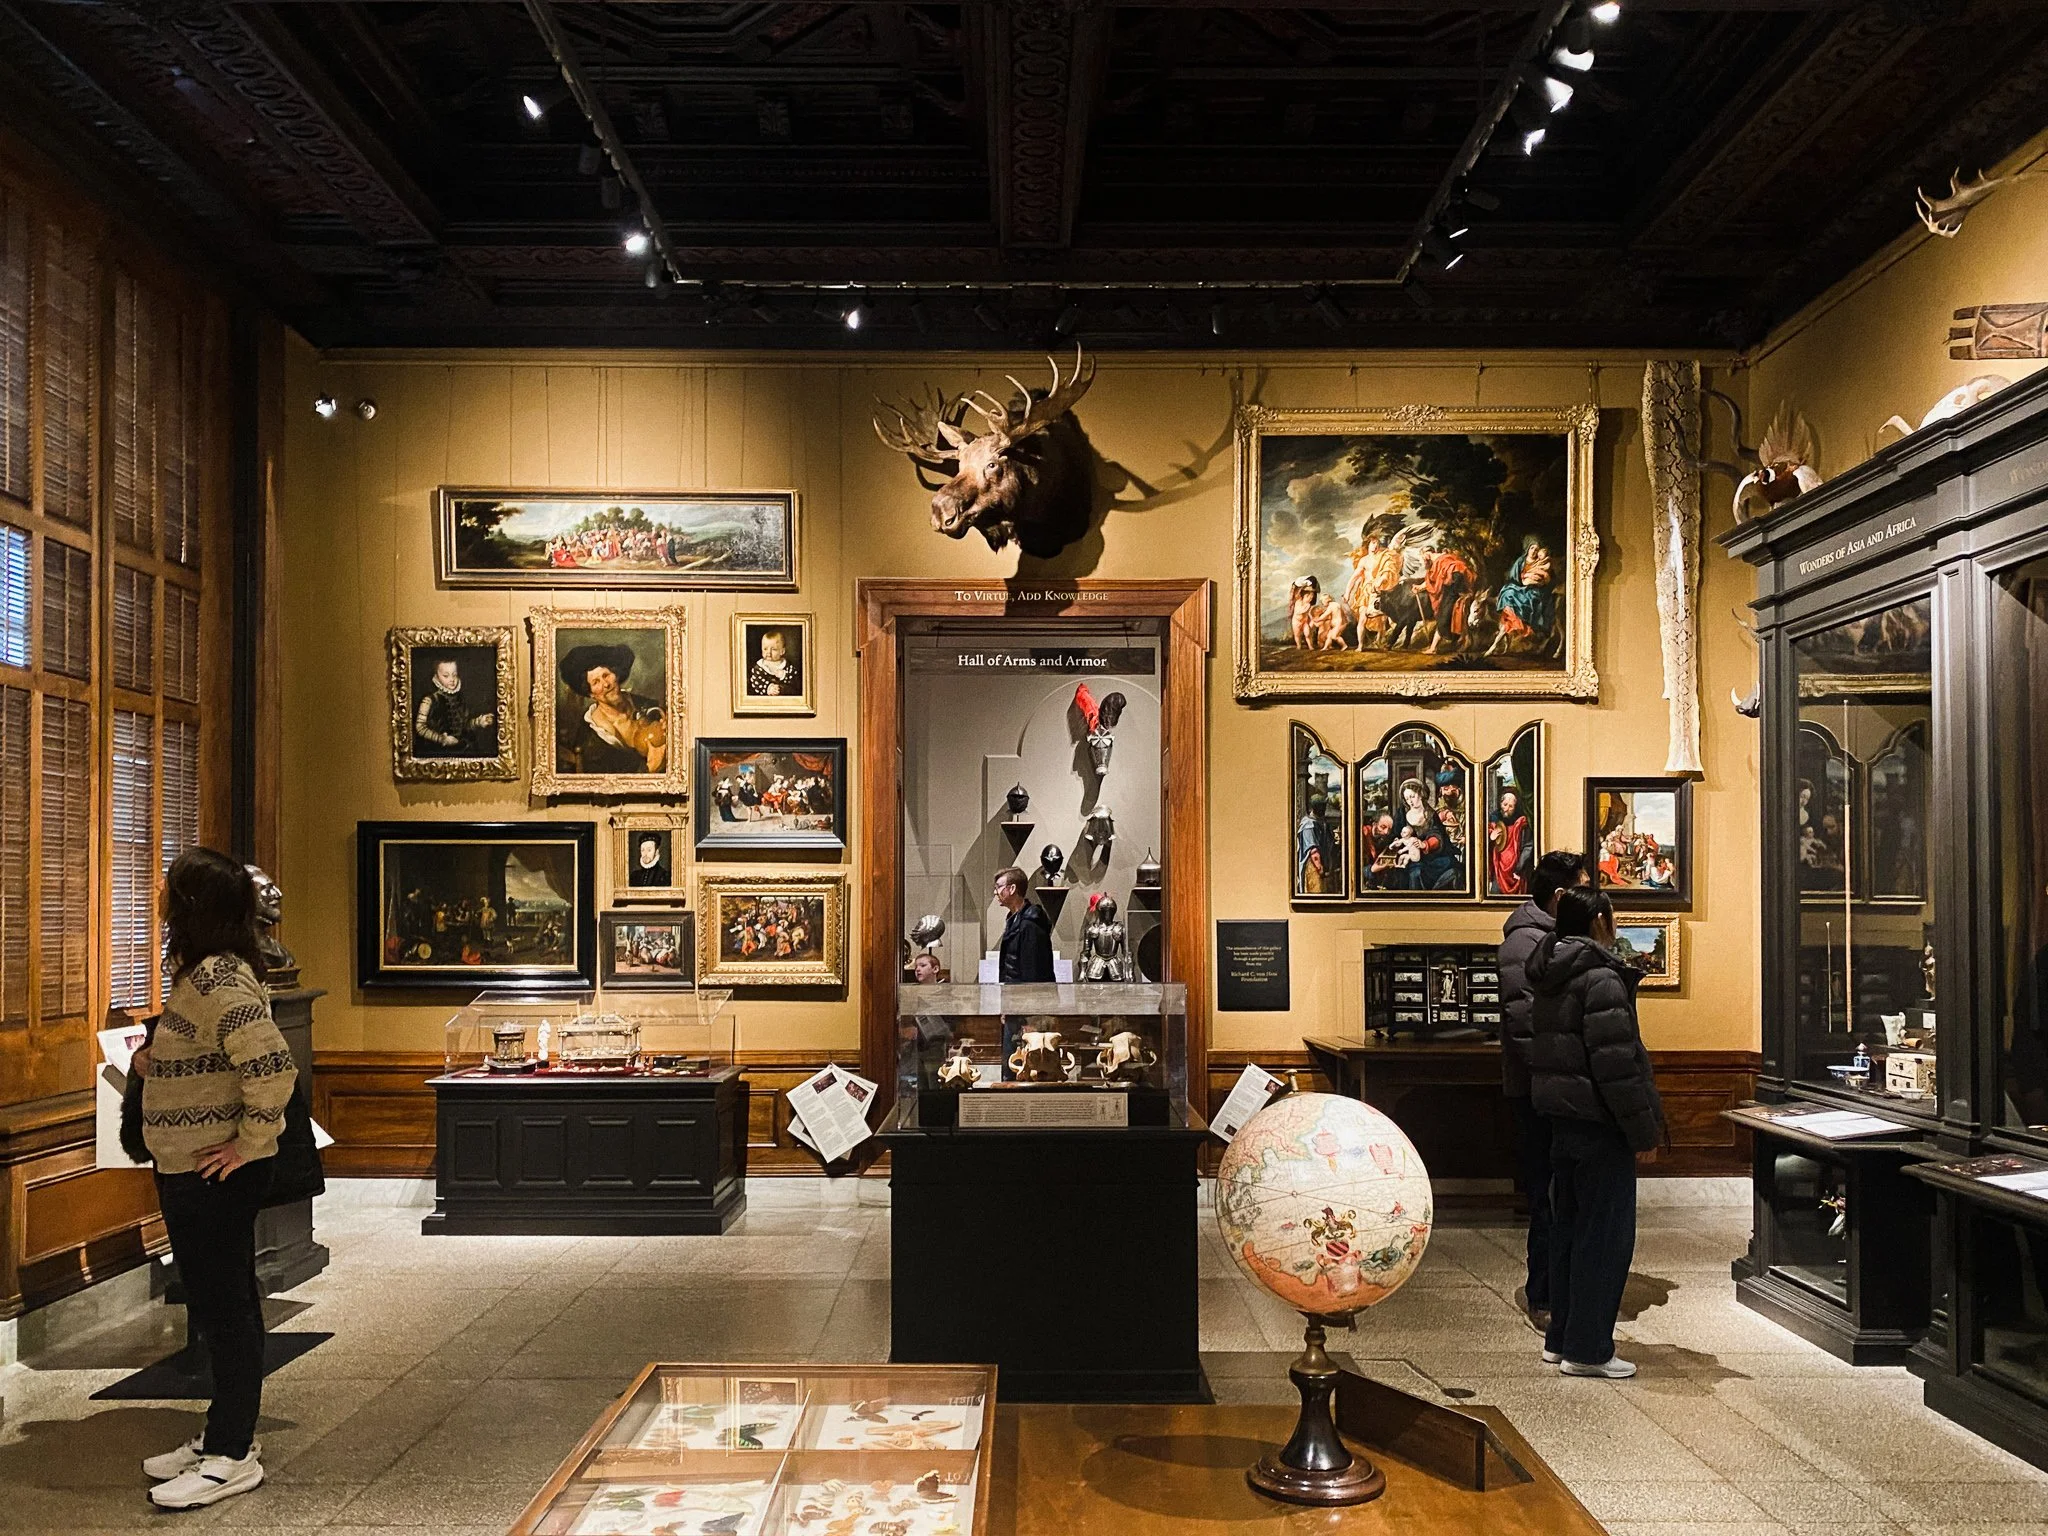
My favorite kind of museum is the one where curators try to put the art in situ—displayed like it might have been in its time. Or, if it’s at a palace-turned-museum, like it actually was.

A room at the Museo Nacional de Arte Decorativo in Buenos Aires. The room is decorated with a large persian carpet, ornate millwork, paintings, ceramics, and furnishings.

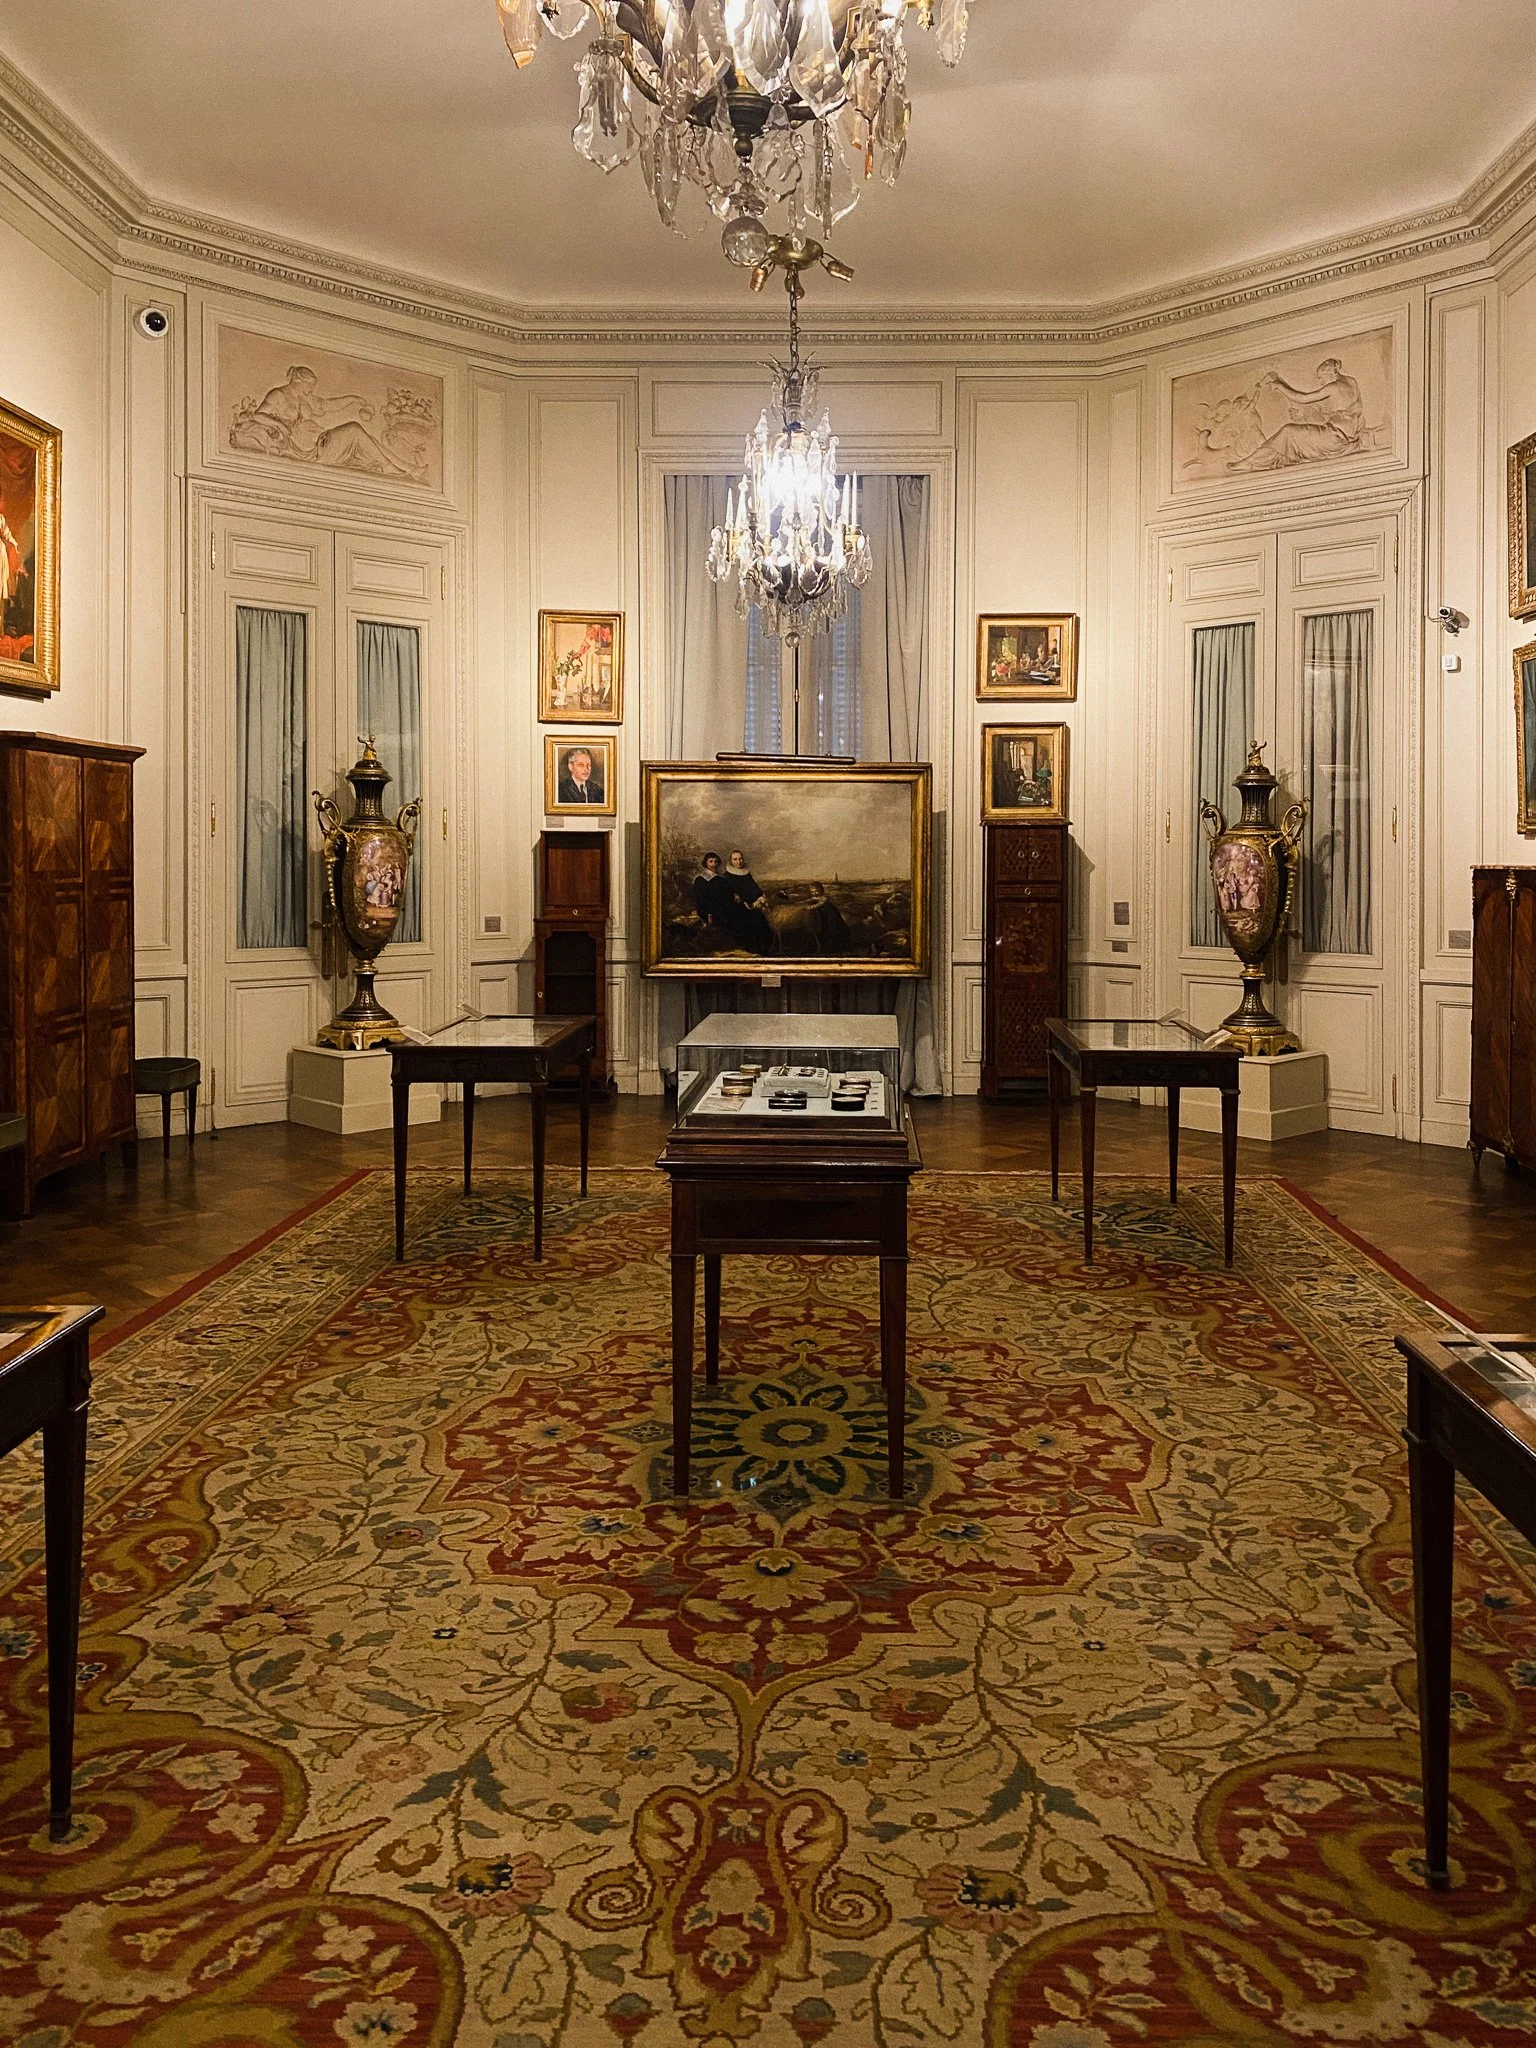
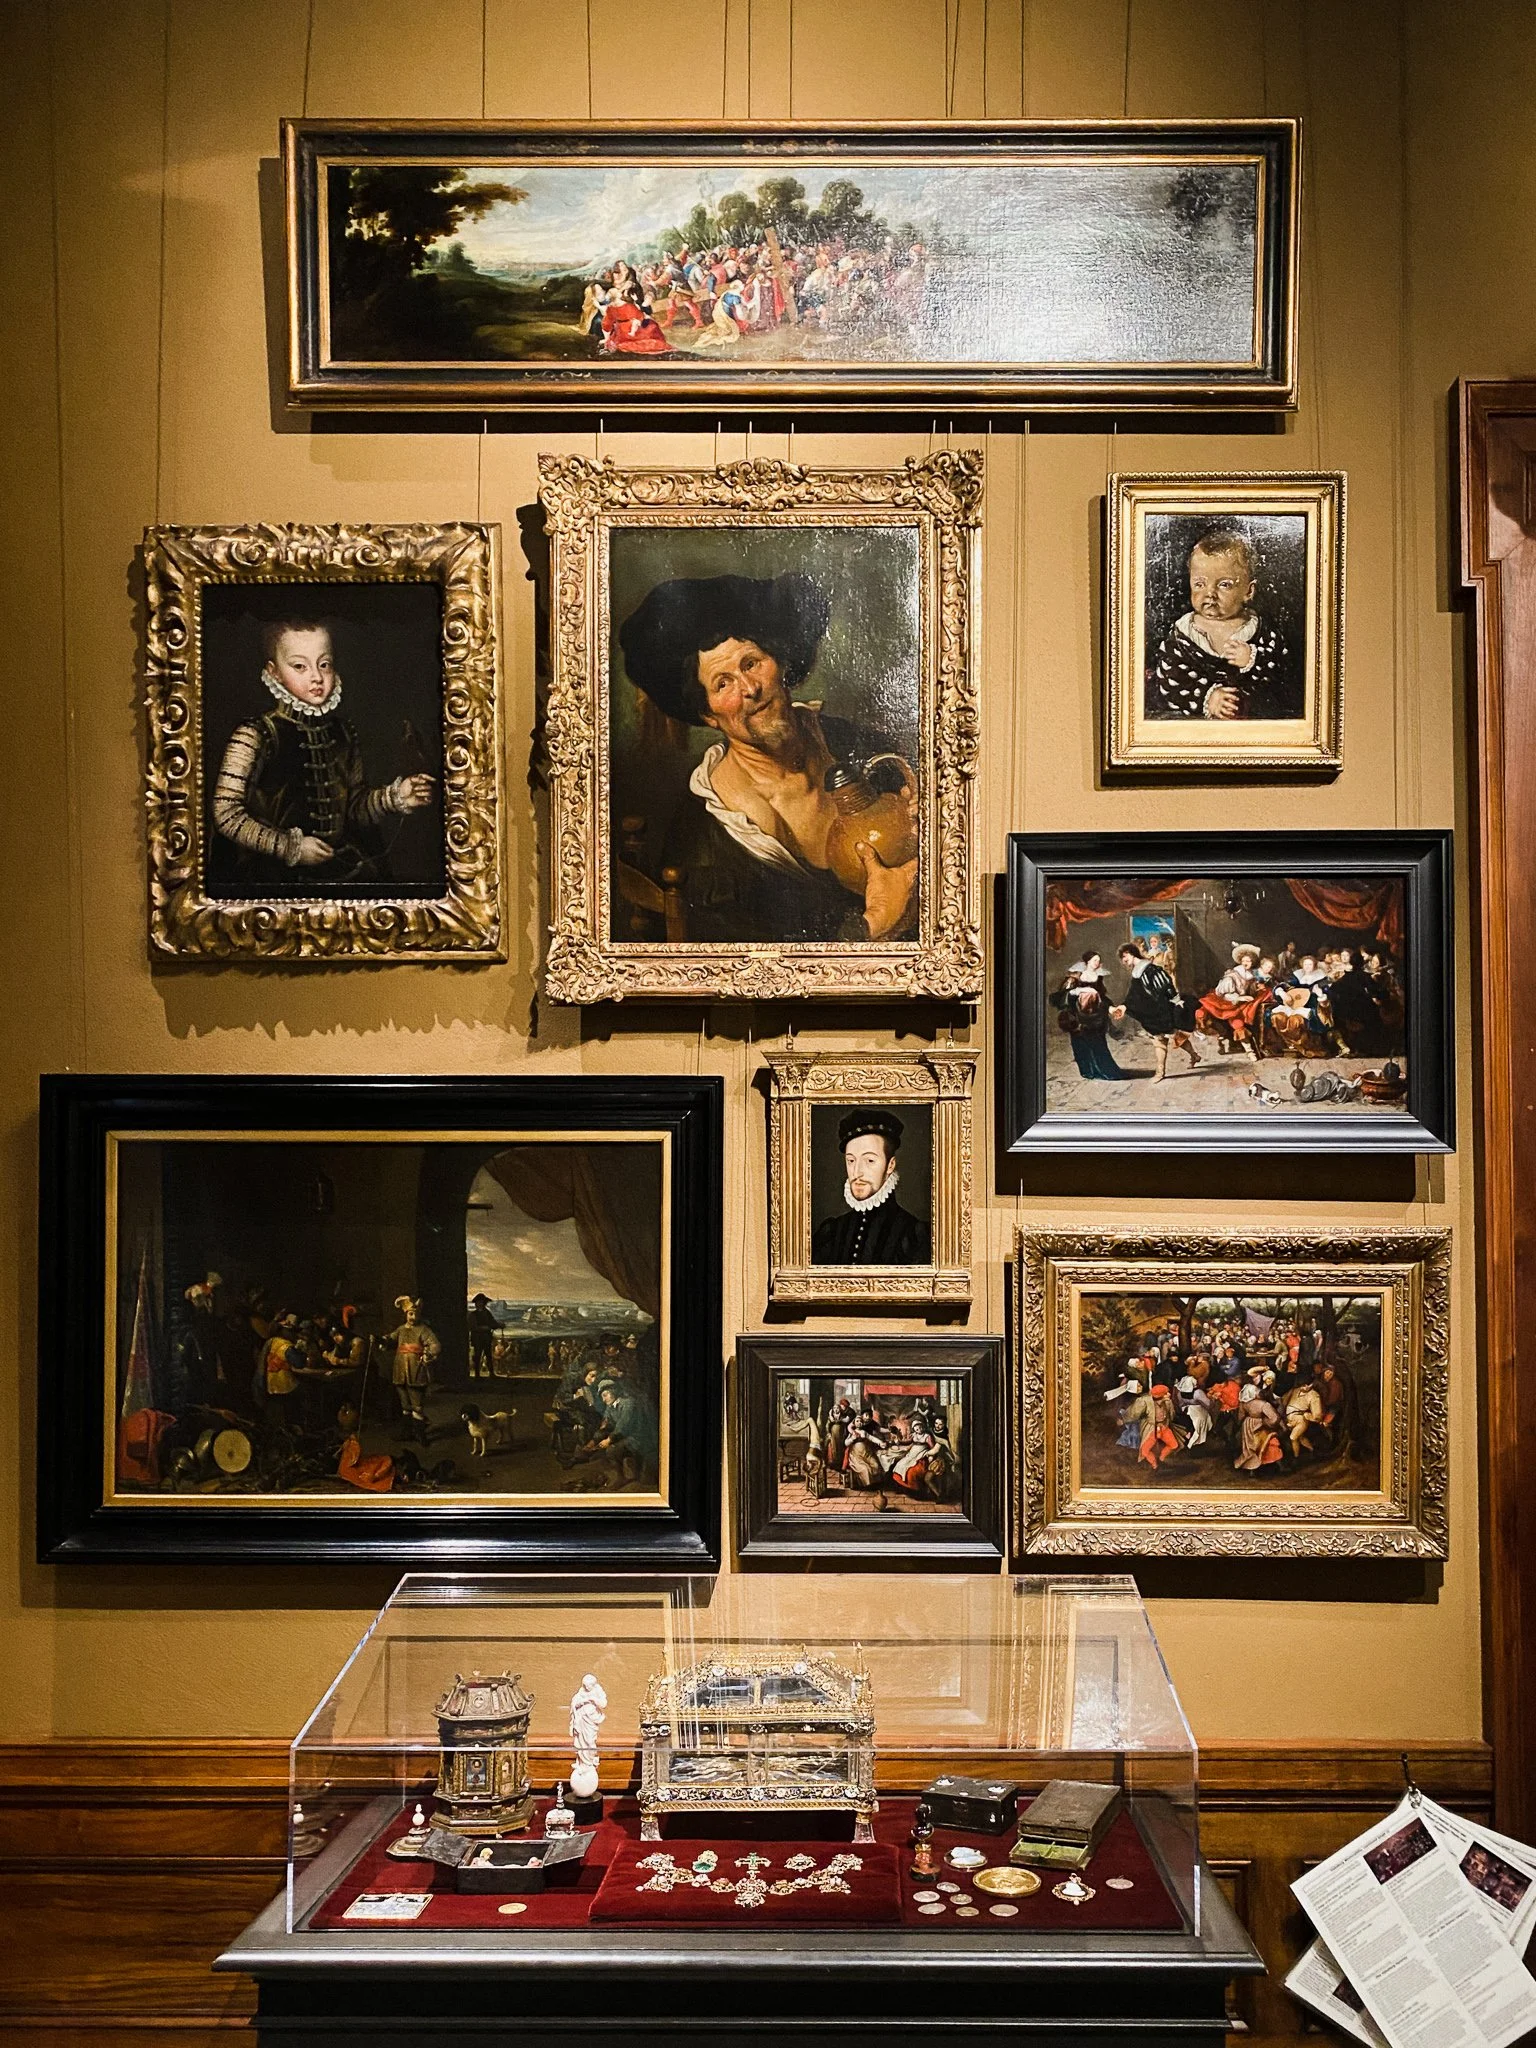
In spaces like this, you see how it all comes together. A jumble of subject matter. A landscape here, a portrait there, a favorite pet. While there's something to be said for a striking collection focused on a particular theme, collections built over time—the ones with a bit of chaos—feel more personal. They tell you more about the collector. This is the art that resonated with them, not the art they thought would look good as a cohesive whole. Art for oneself, not for the ‘gram. Or whatever the 18th century equivalent was.

A gallery wall at the Walters Art Museum featuring a large floral painting with a rabbit surrounded by smaller paintings of landscapes and cherubs
A gallery wall at the Walters Art Museum of a variety of paintings of different sizes, some showing portraits, others showing more complex scenes

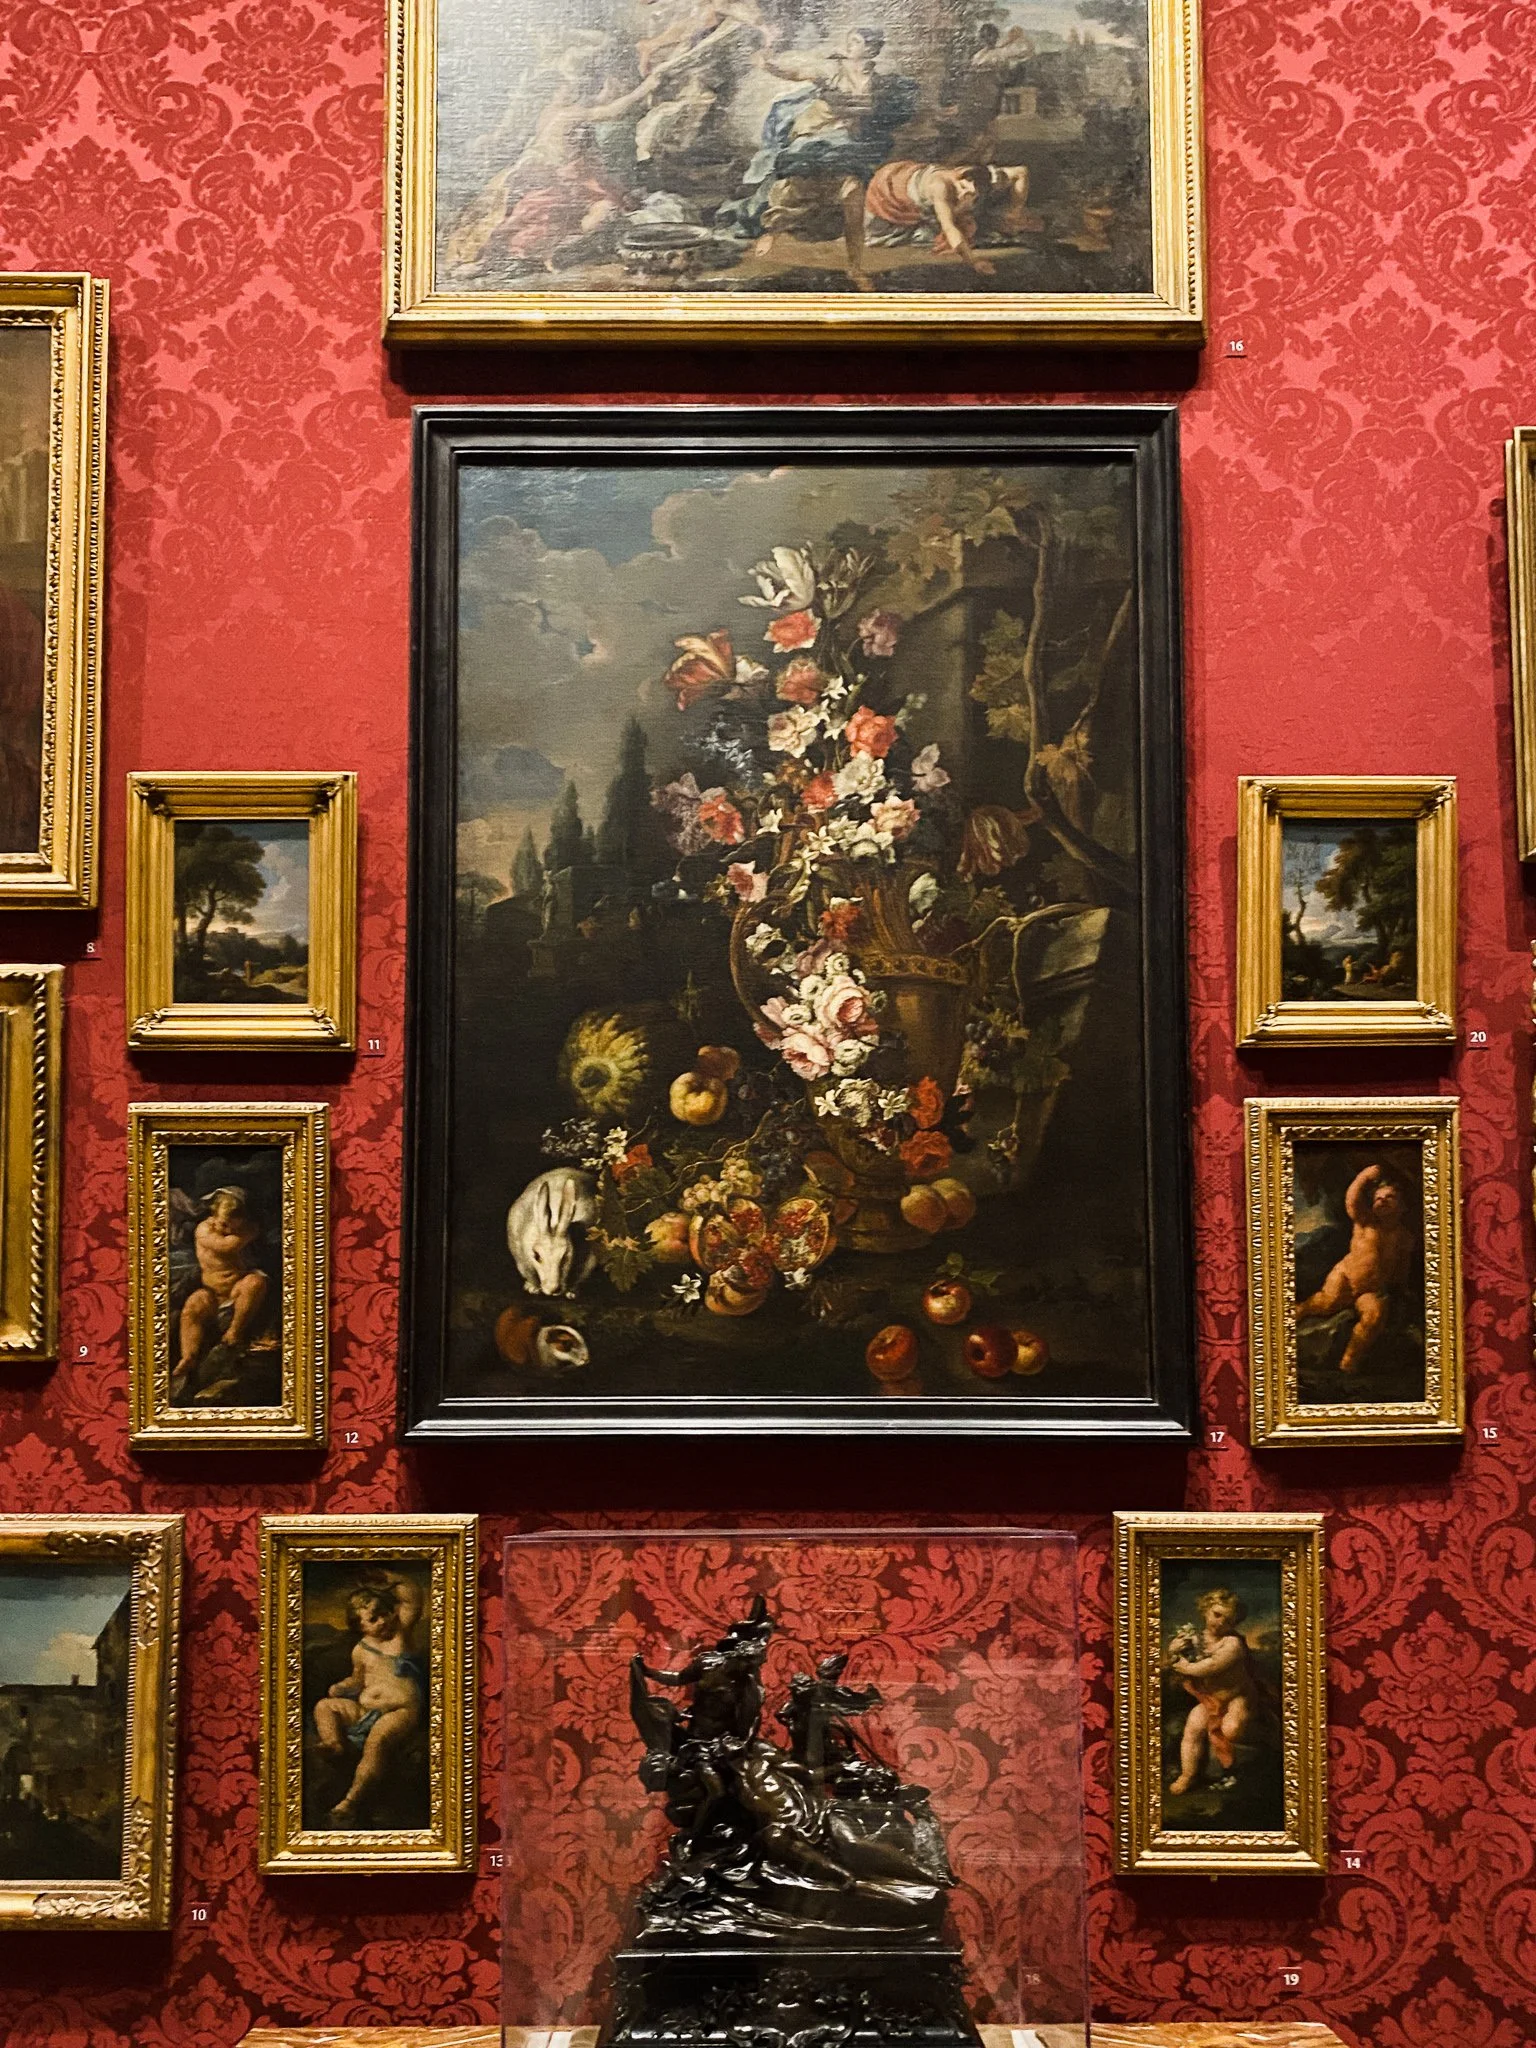
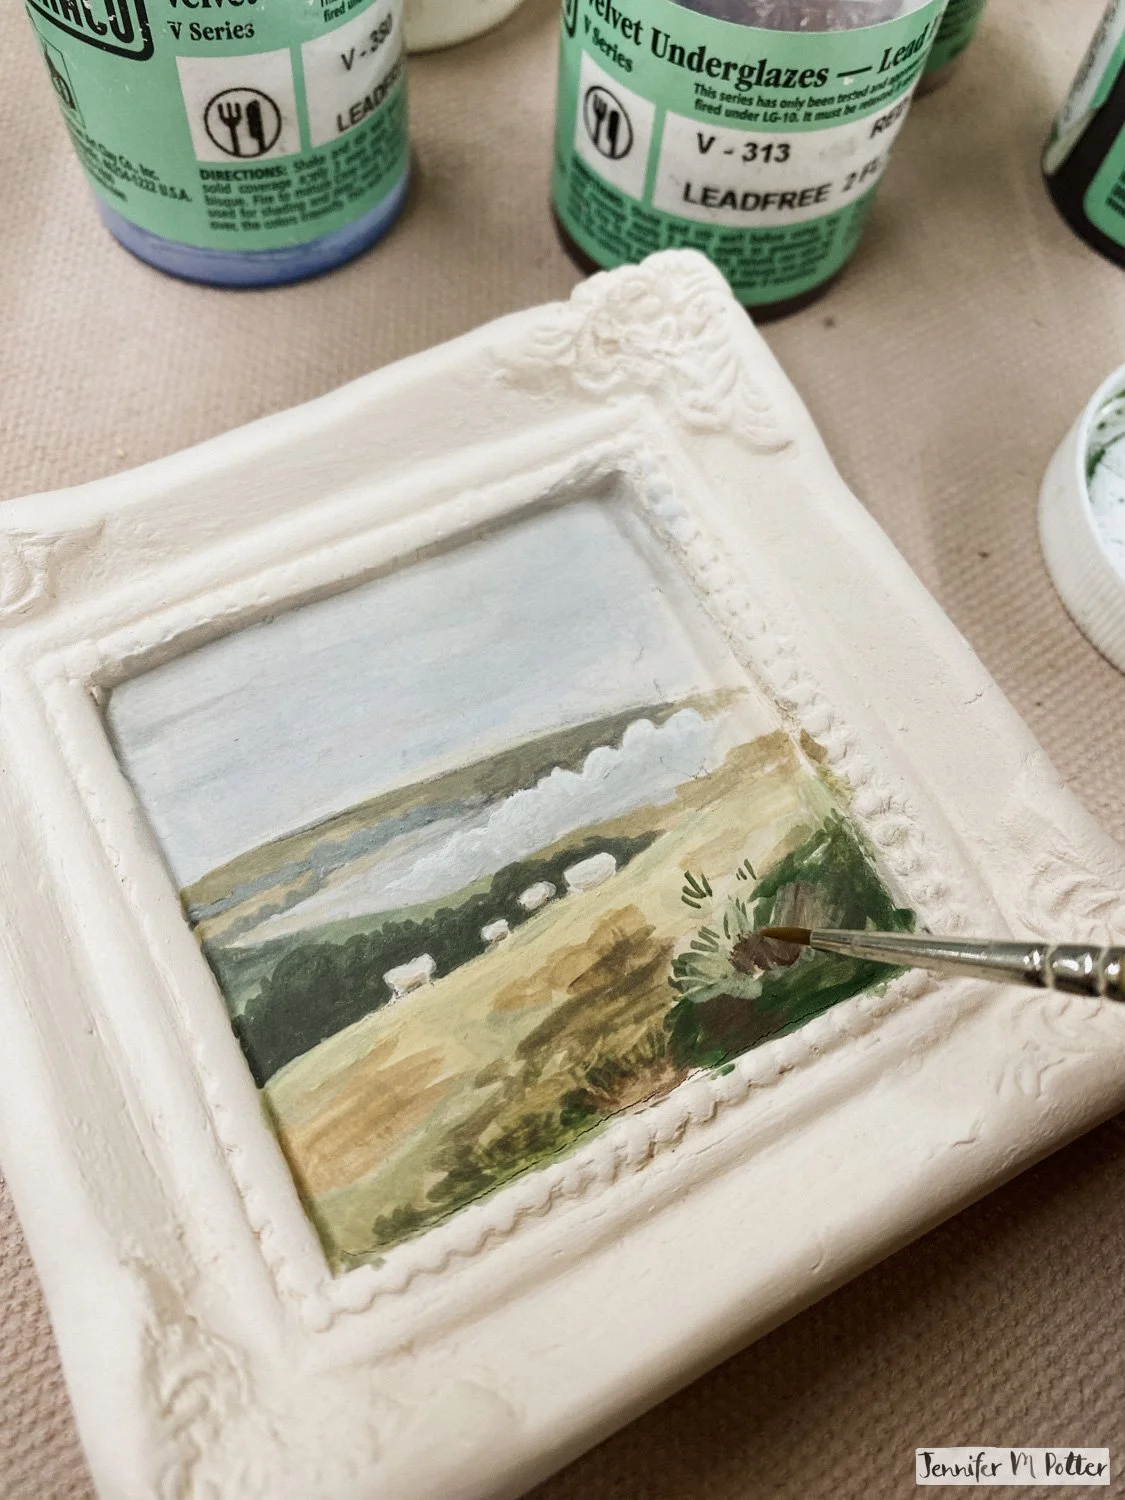
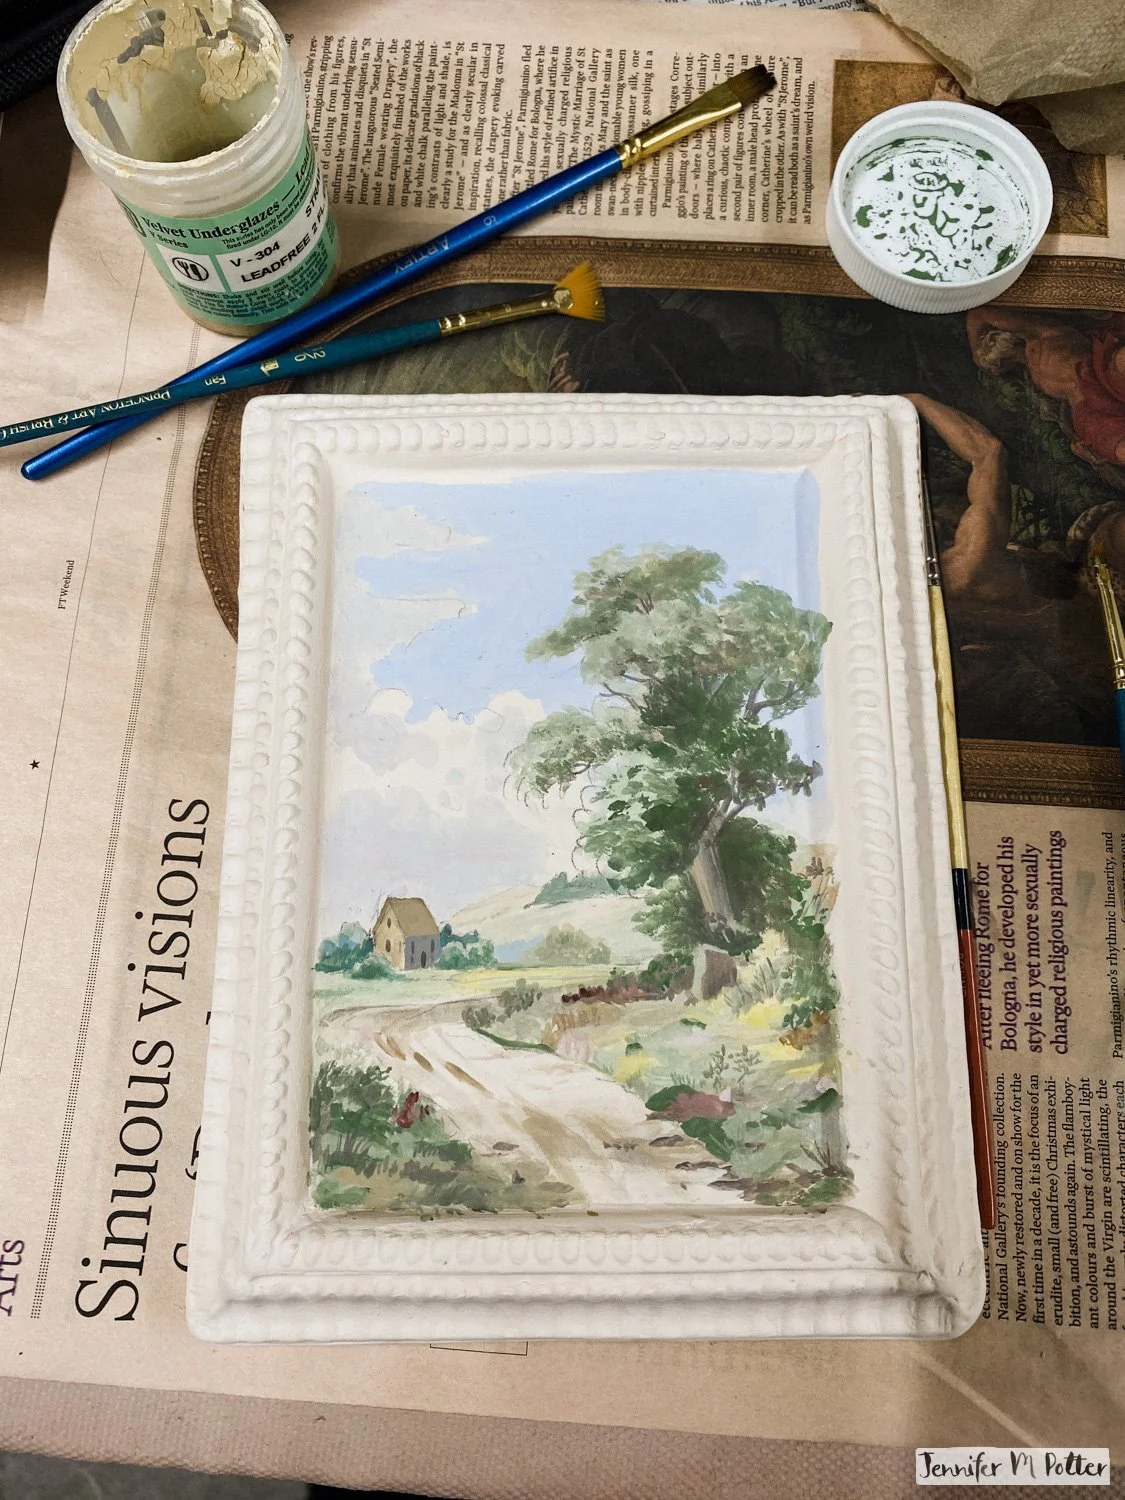
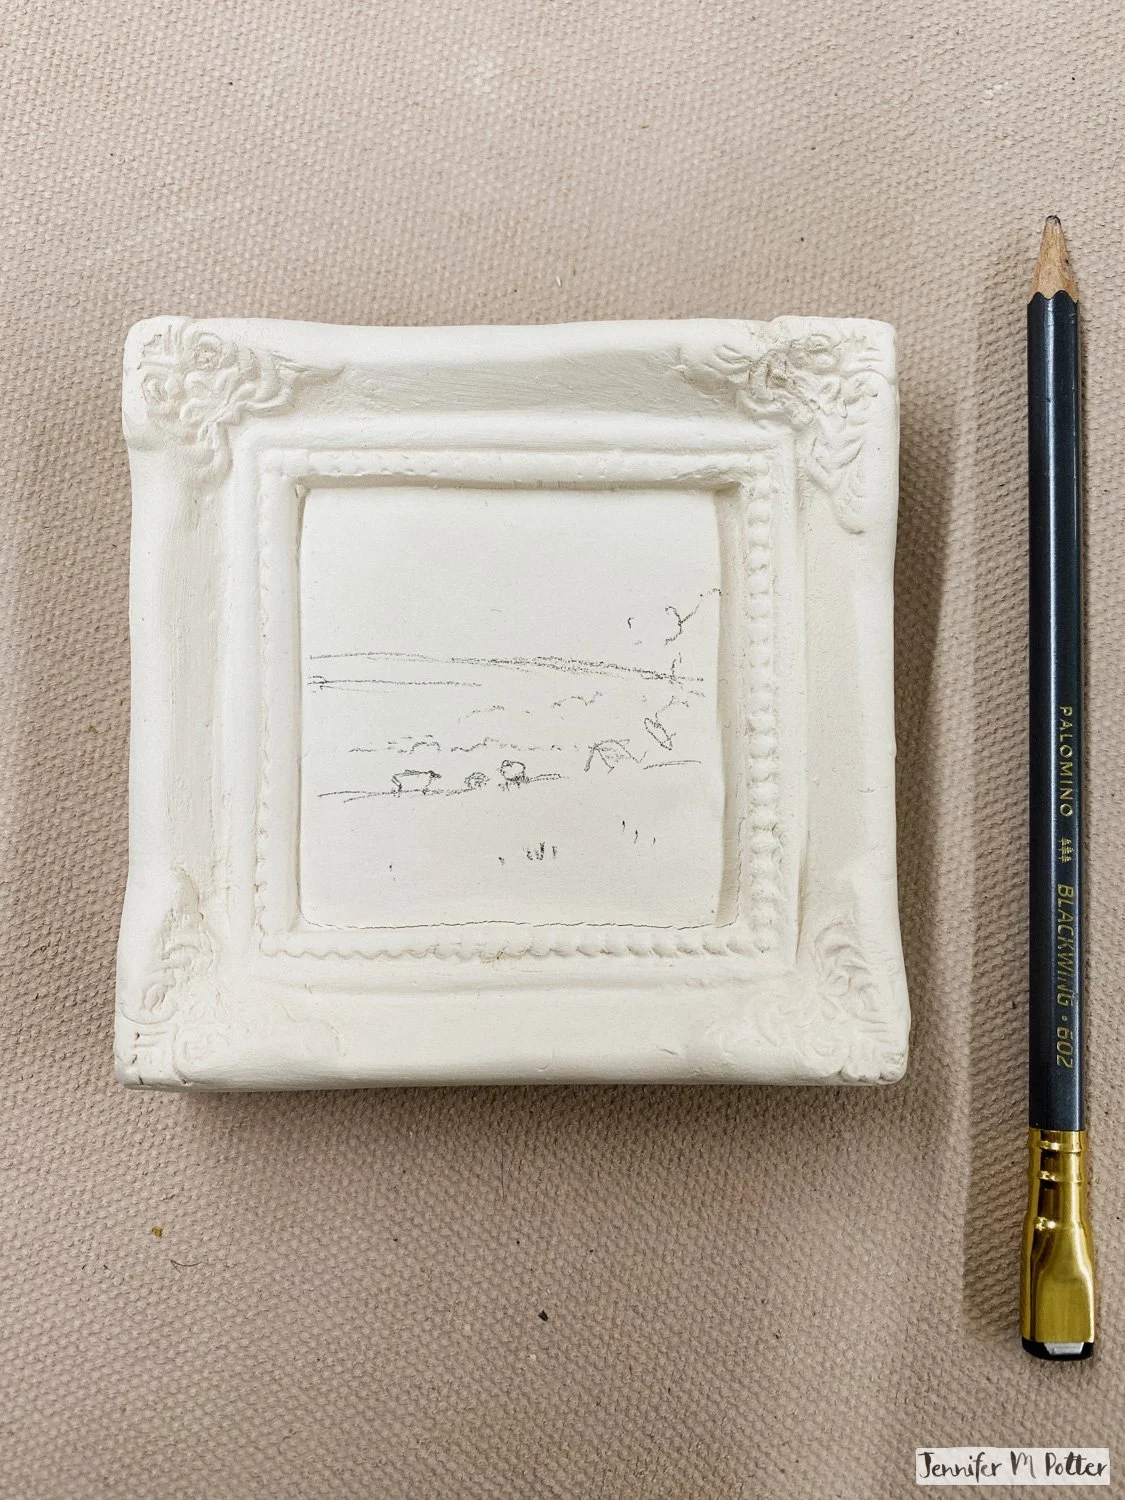
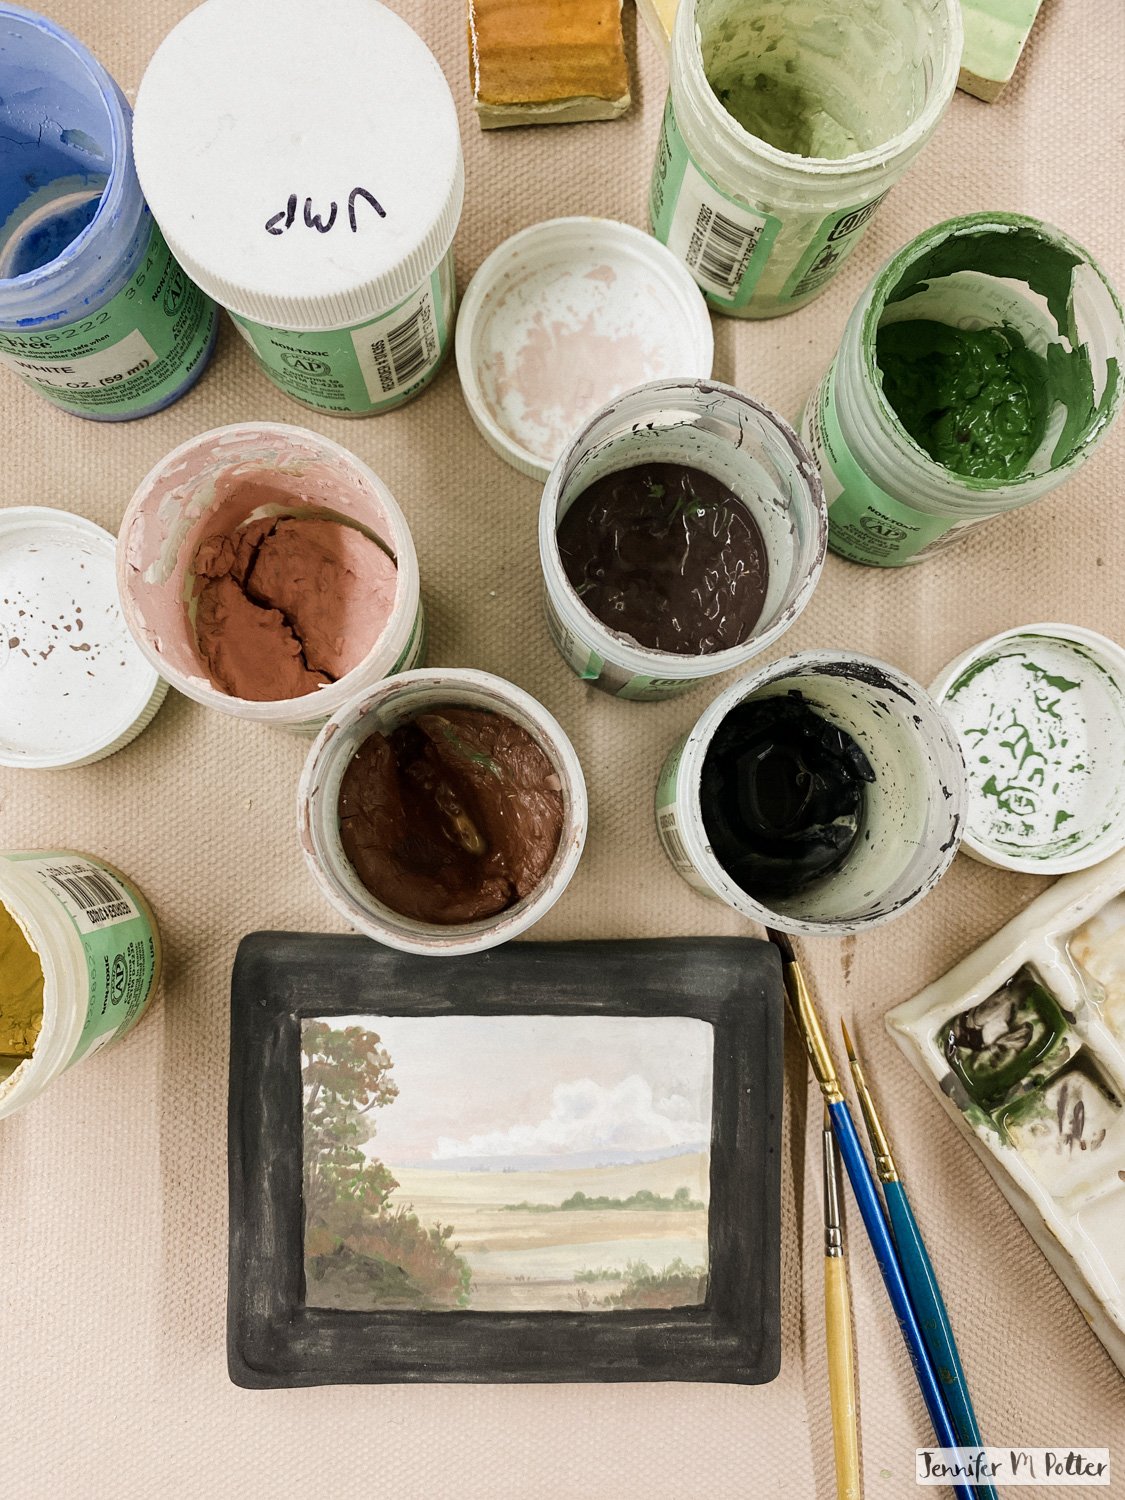
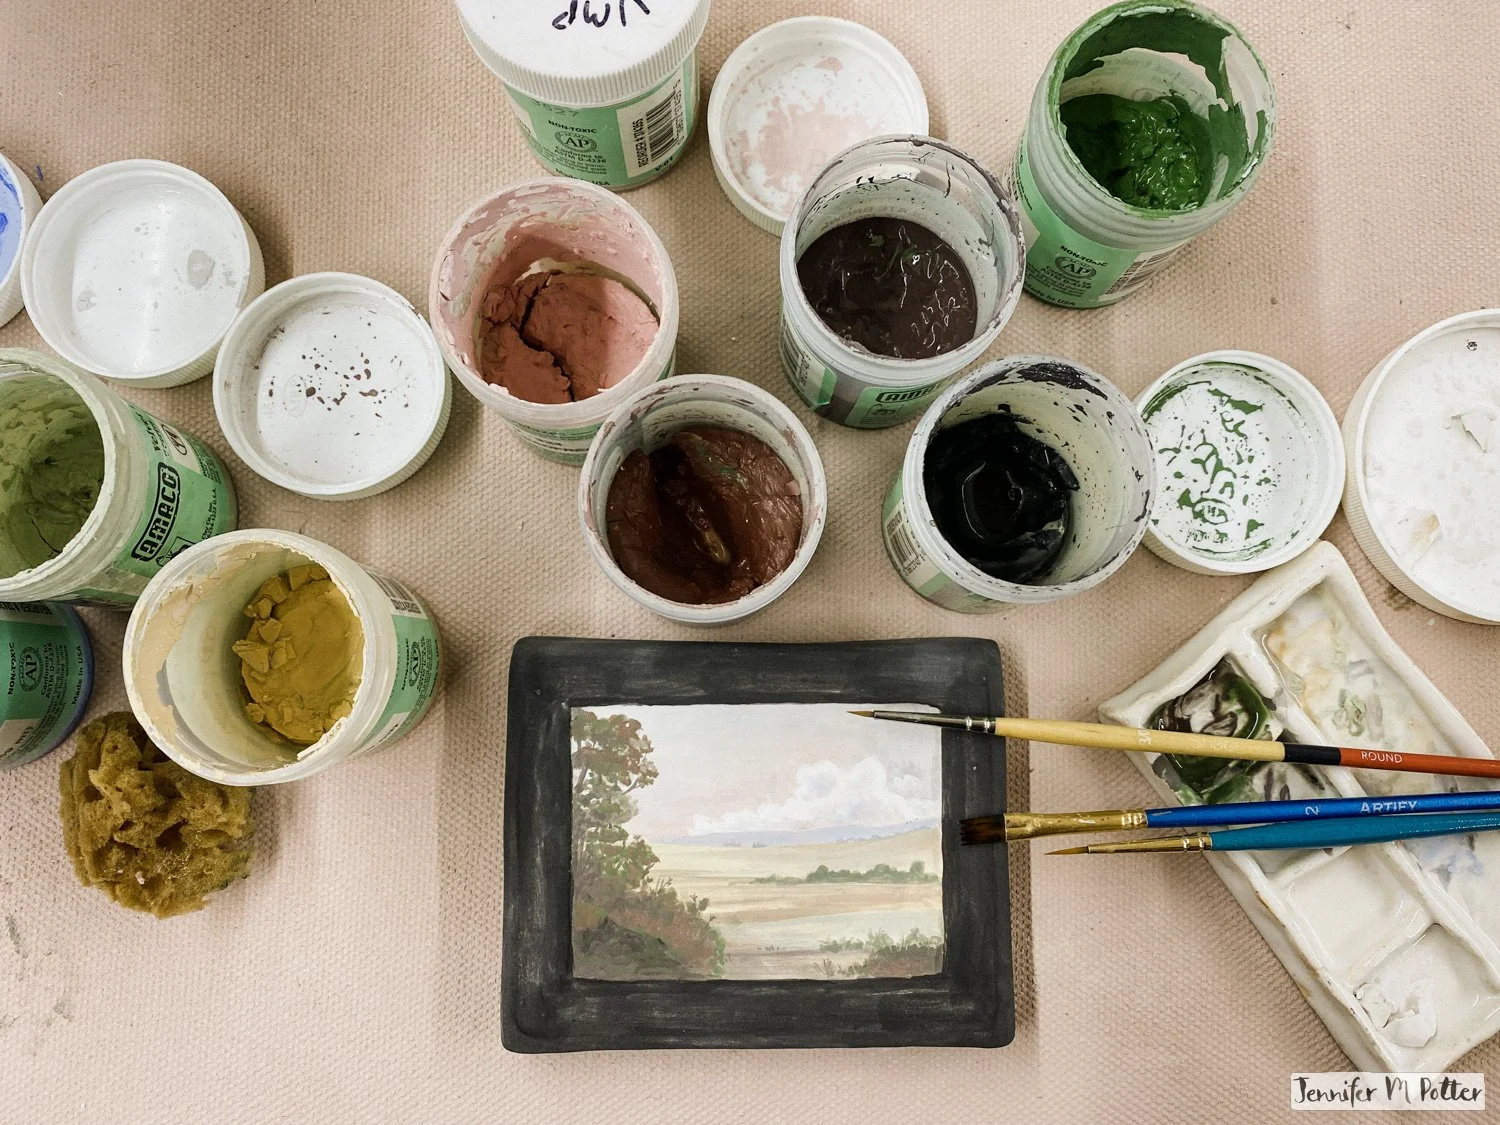
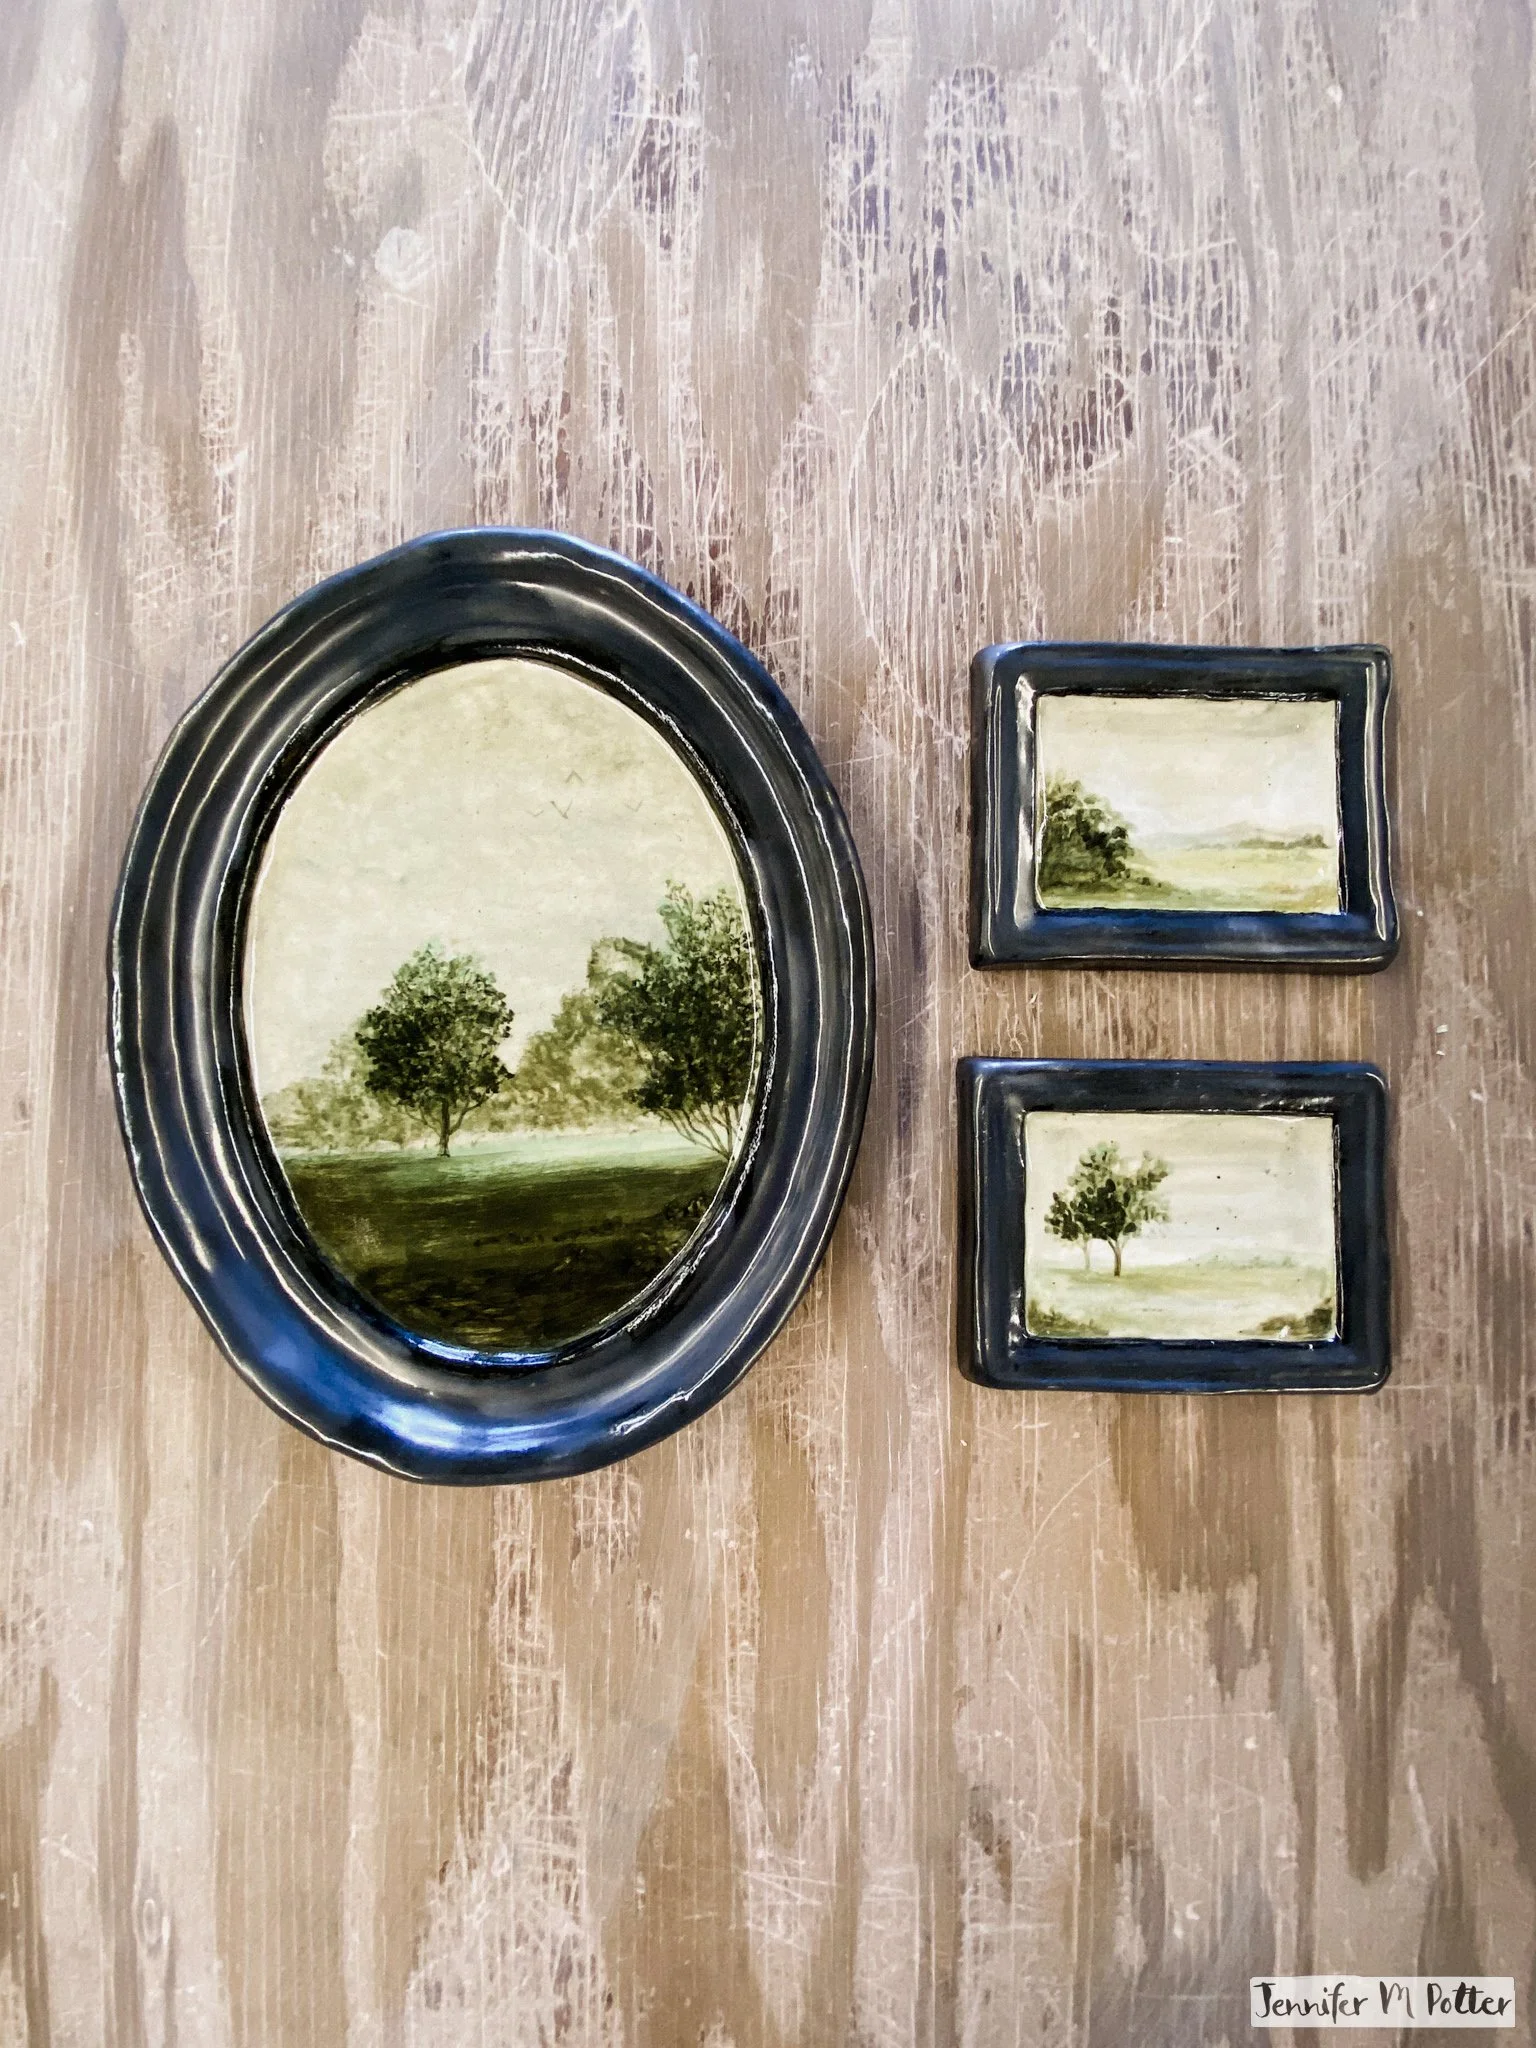
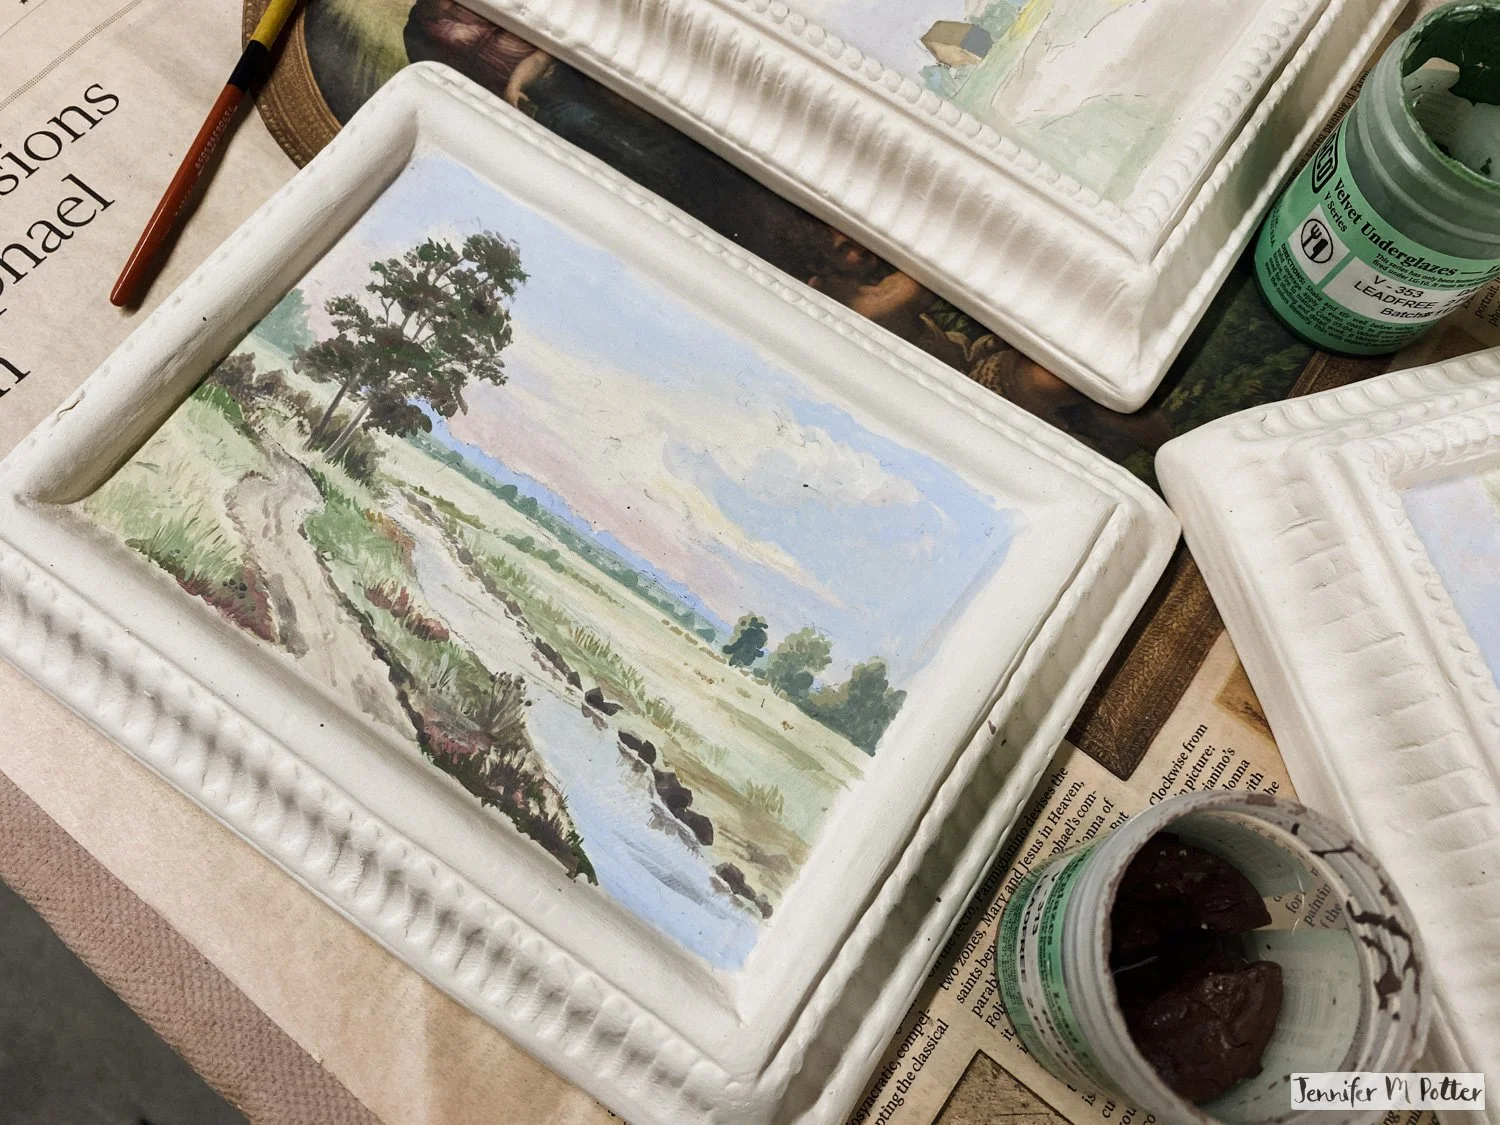
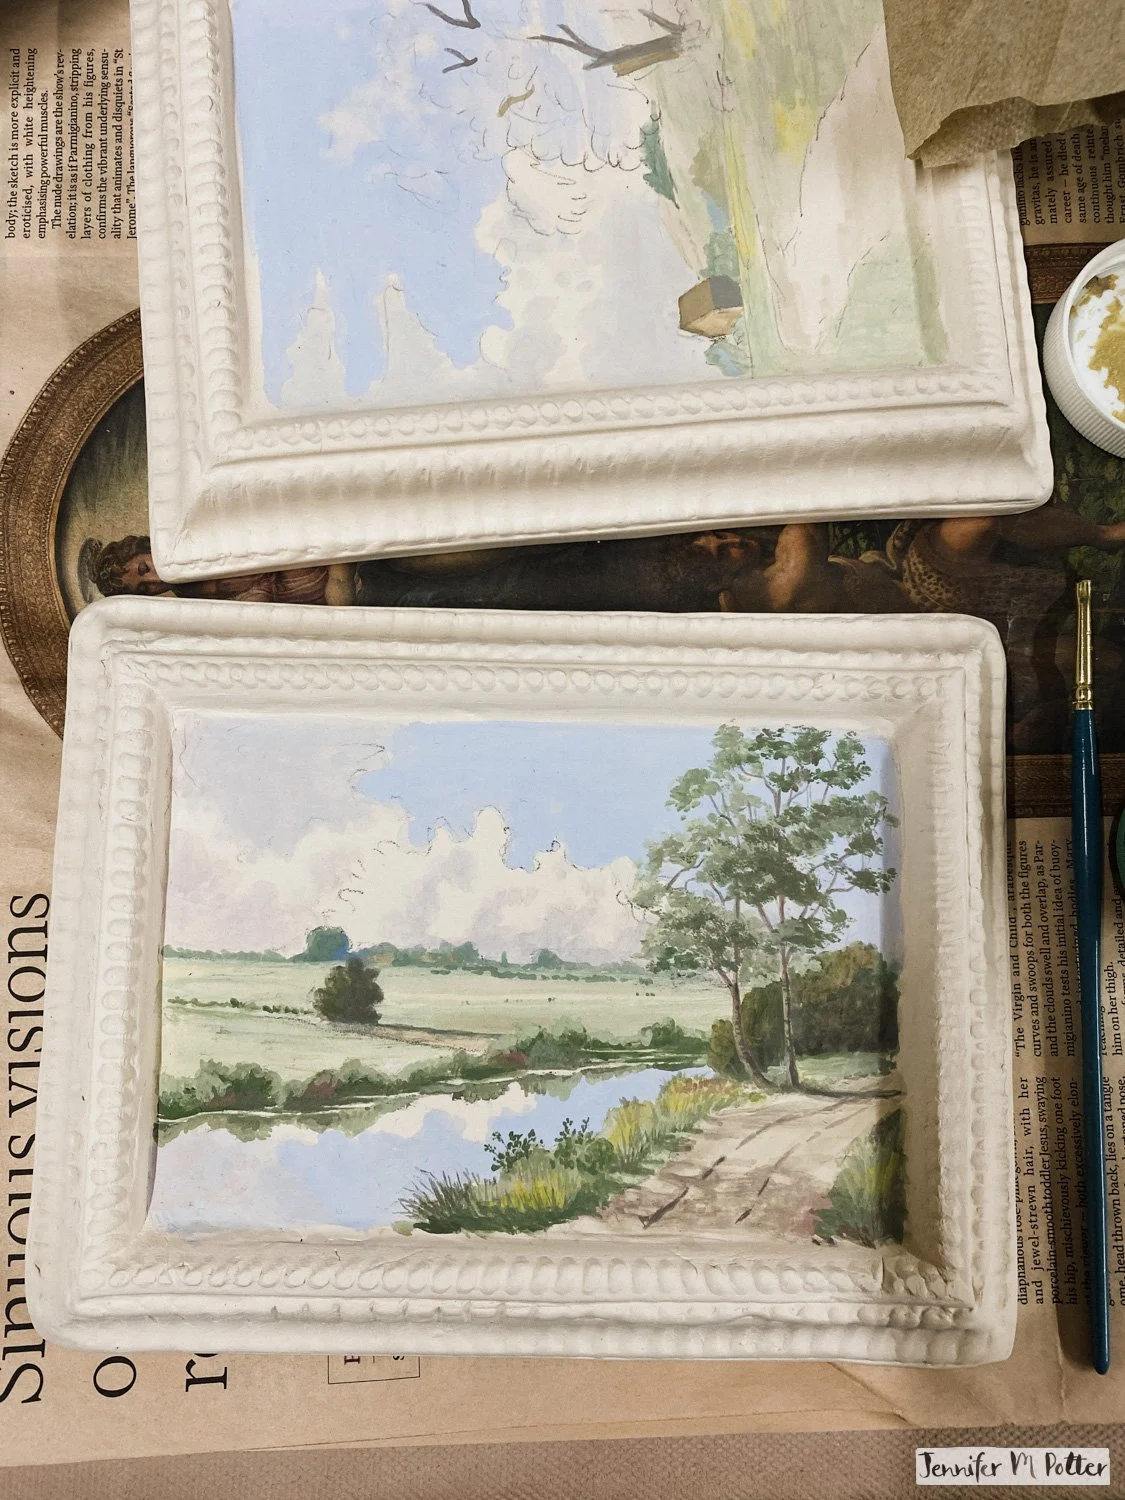
I love imagery from the natural world—landscapes and animals especially. Inspired by these gallery walls, I knew I wanted to create more than just landscapes for my ceramic paintings.

Gallery wall at the Museo Nacional de Bellas Artes in Buenos Aires showing a painting of a dog looking for quail over two smaller paintings, one featuring a child's portrait

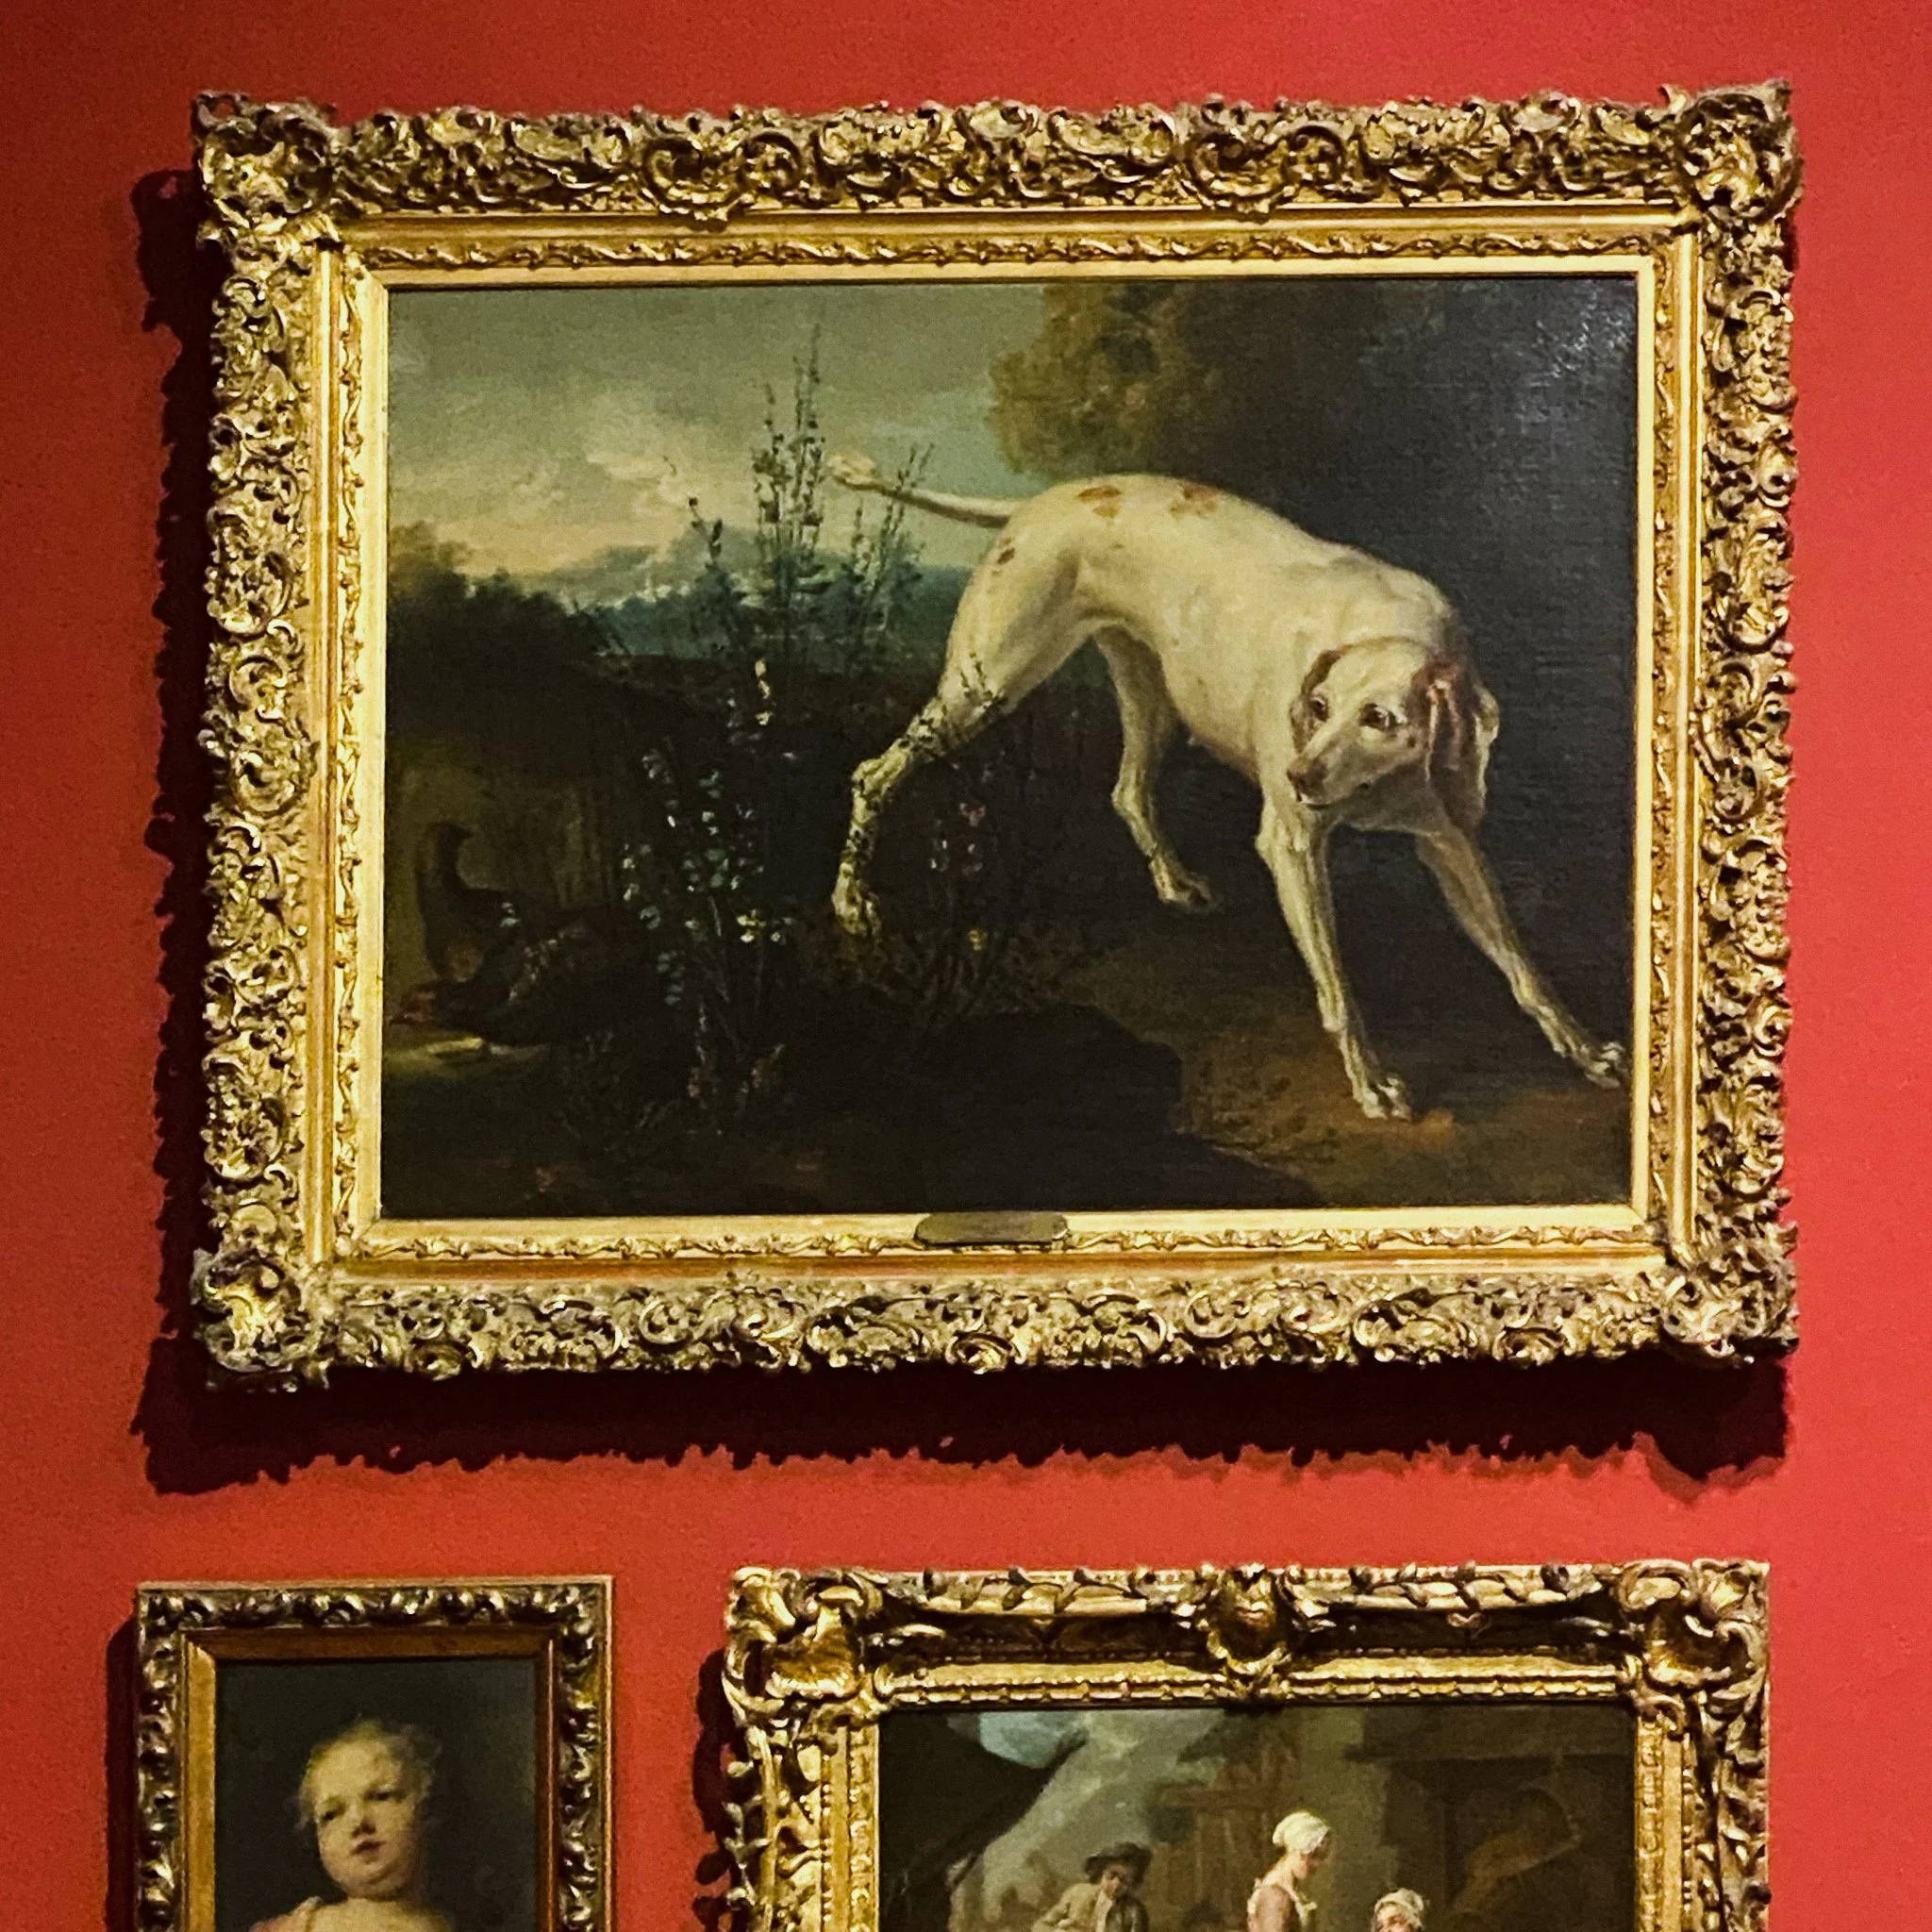
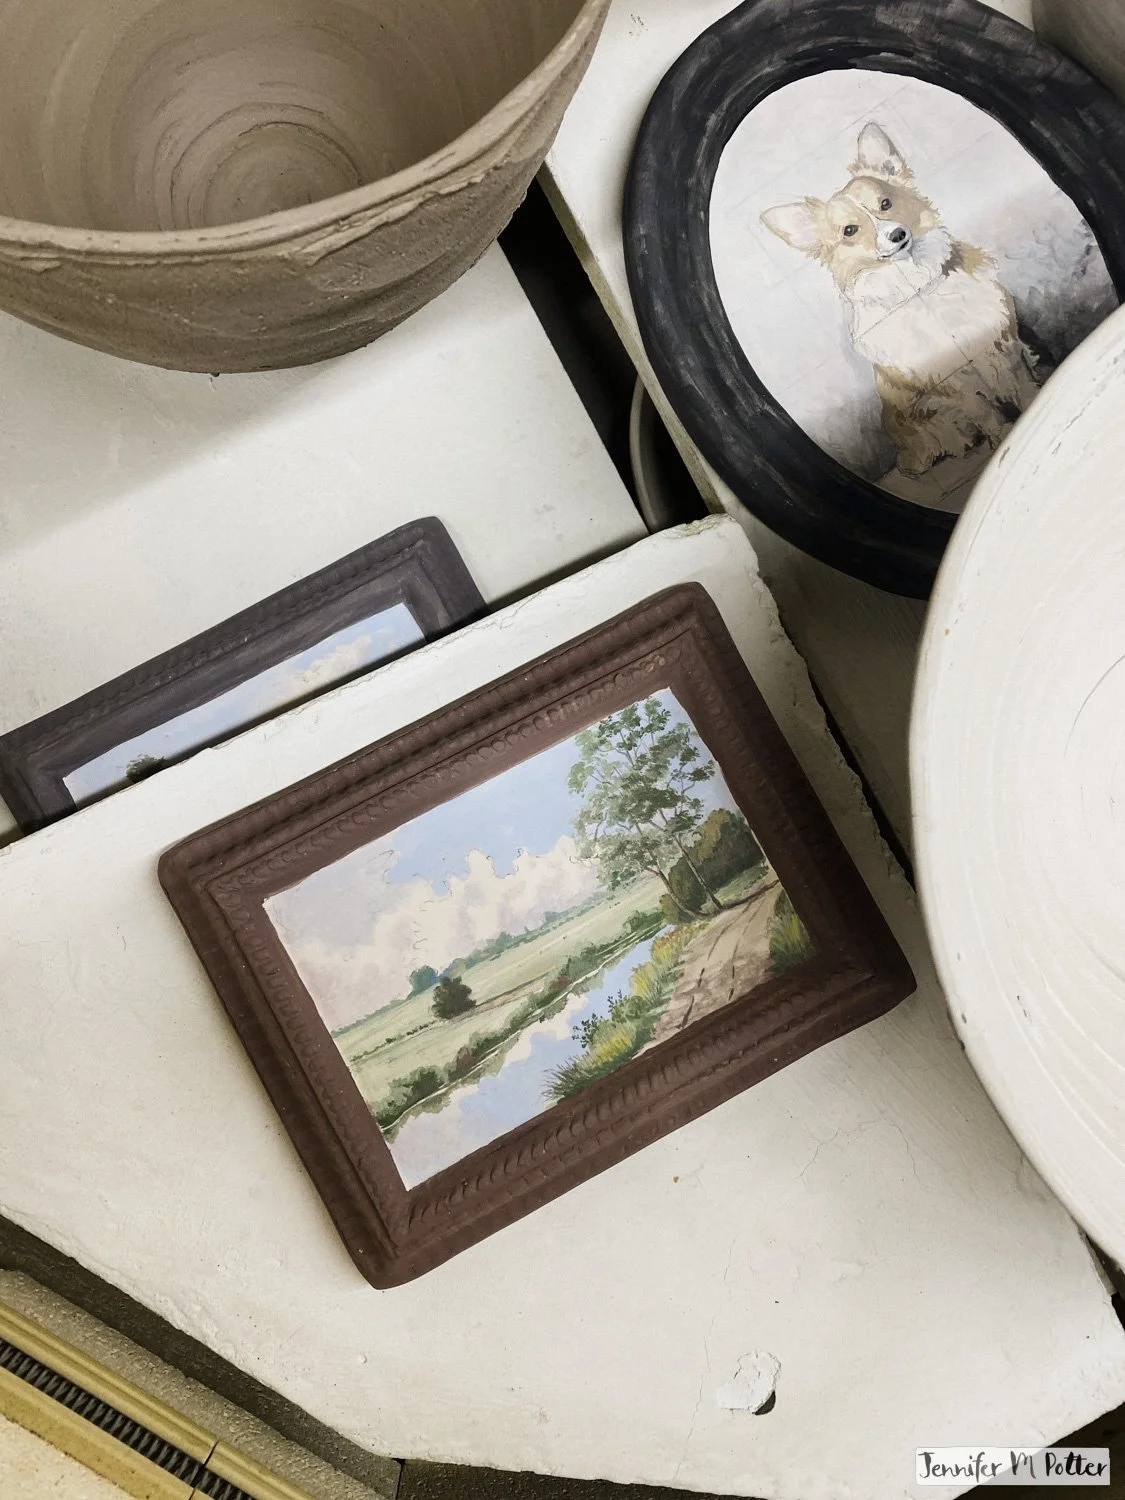
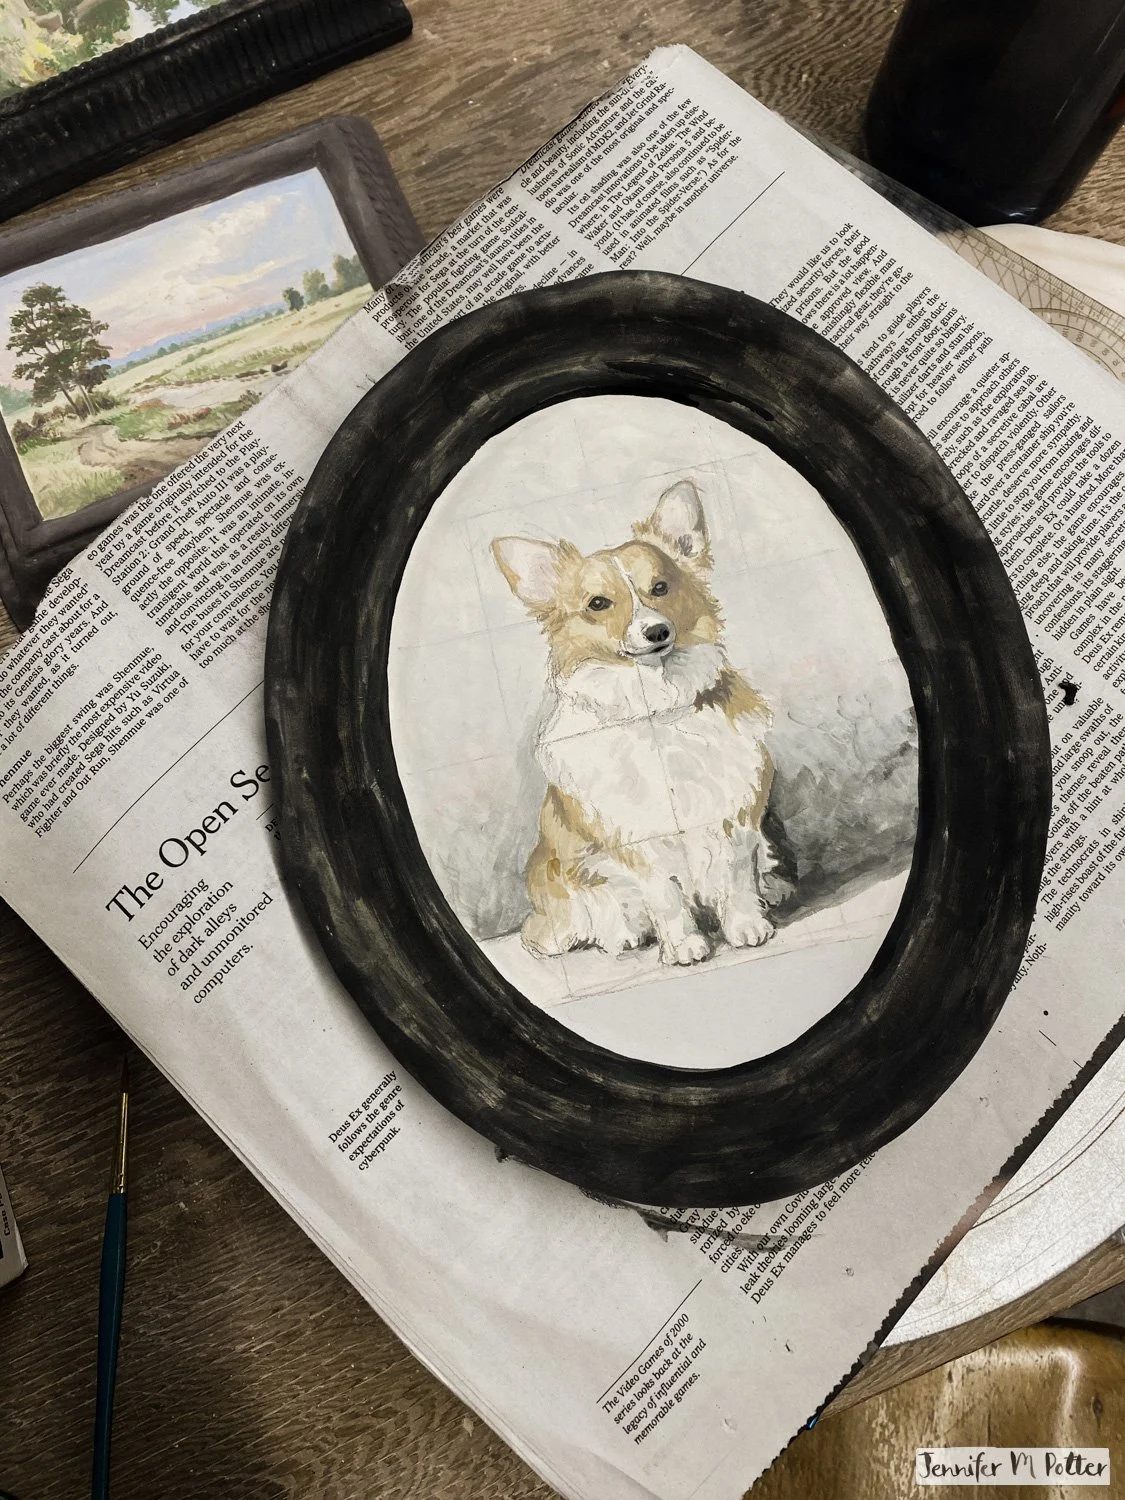
So I painted a fluffy corgi.

A ceramic painting in progress of a corgi.

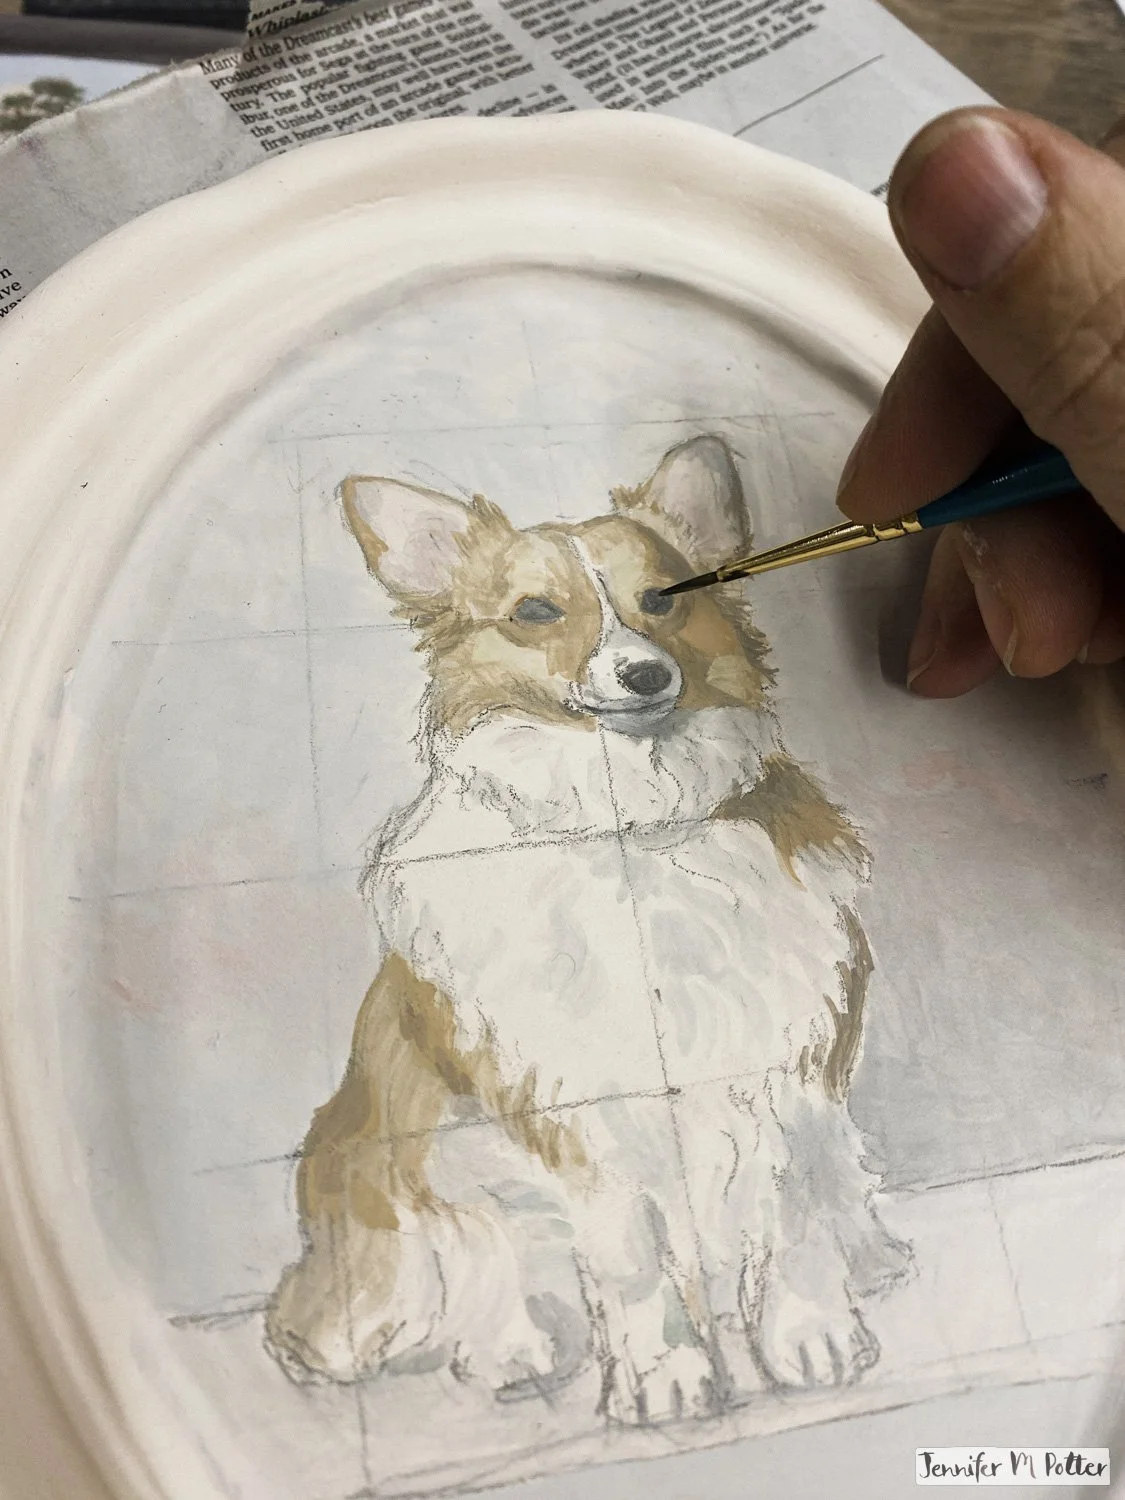
I plan to do a ceramic portrait of Frisket eventually, but I need to decide on the right photo to draw from. For now, the corgi is a good test subject. Round body, radar ears, that ridiculous fluff that somehow feels old-world.

The ceramic underglaze corgi painting ready for a second bisque fire.

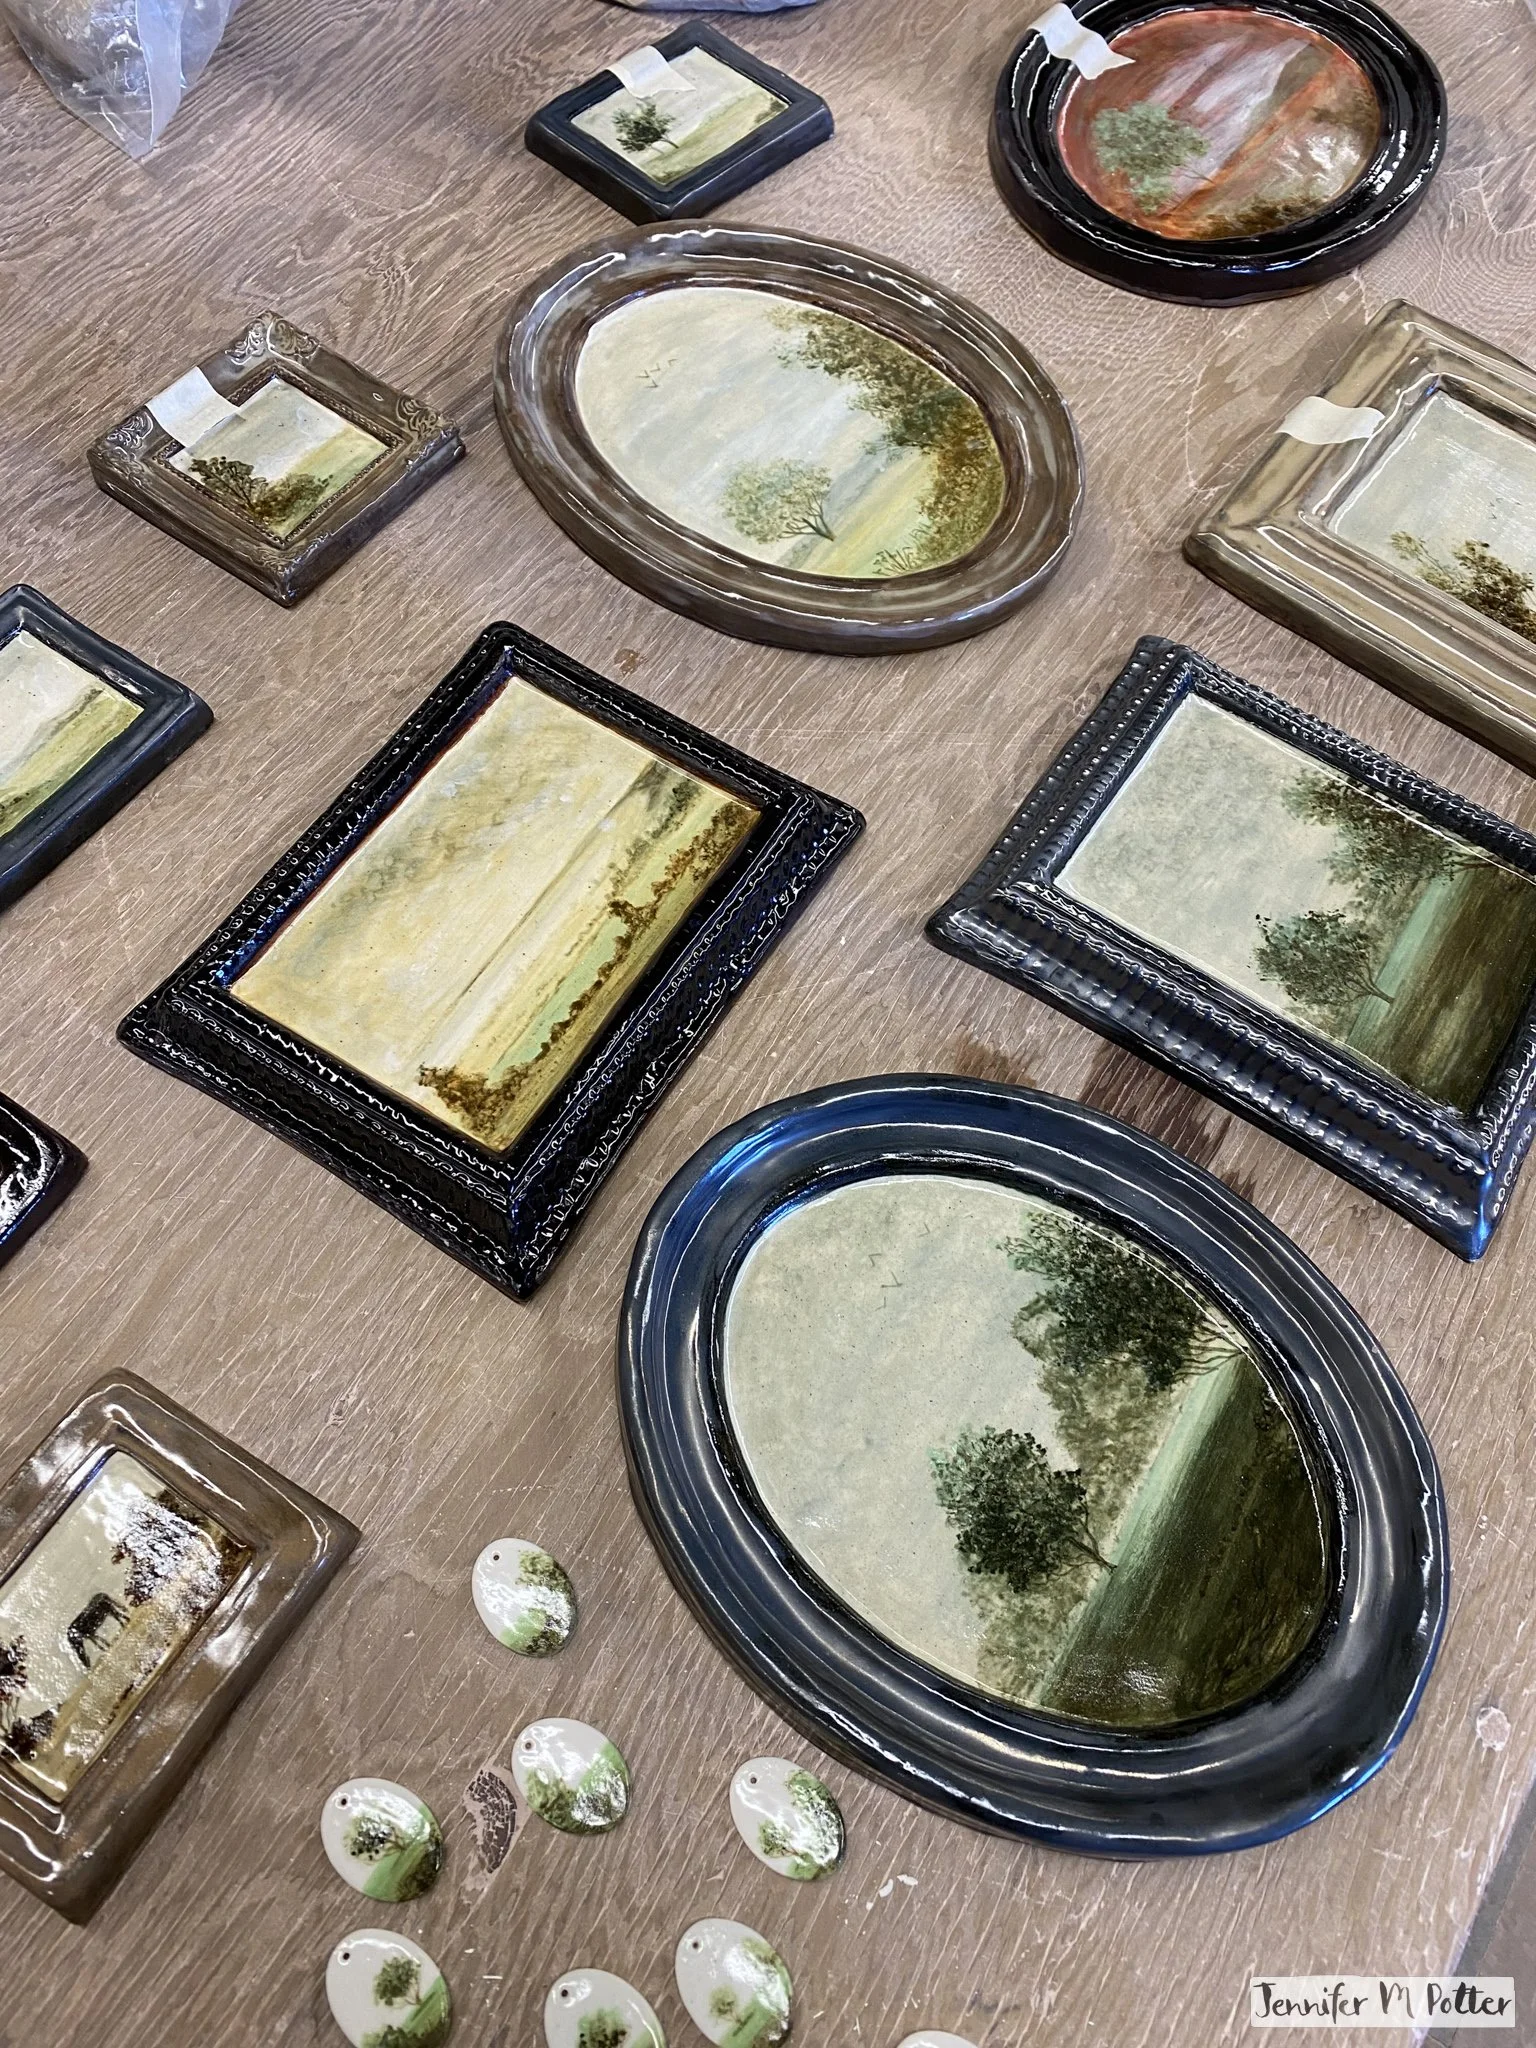
I'd like to do more like this. Still life scenes with fruit in bowls. Floral arrangements. More animals of course. Maybe human portraits, though that seems particularly challenging. Someday.

The Time It Takes
Frisket walking down the middle of an unplowed street covered in snow and ice

Baltimore got two feet of snow in January, and then the temperature dropped and stayed there. The snow turned to ice. The alley where we park became impassable, and the Potters Guild parking lot wasn't much better. I stayed home.

Frisket standing on a corner looking at crossroad of plowed and unplowed streets. Snow is piled all around.

The next week, things warmed up just enough for the ice to start melting—seeping across the slanted sidewalk, refreezing overnight into something you couldn't see. I was walking Frisket when I turned a corner and went down, twisting my knee and pulling a tendon. Another week home.

I finally made it in for open studio, but spent most of it learning to pug reclaim—running old clay through the pugger until it comes out the other side as something uniform, workable again. It’s a good thing to know, but not what I'd planned.

The next week I got client revisions, so I stayed home to work on an approaching deadline. Same for this week. It's been nearly a month.

I've been thinking about time a lot lately, for obvious reasons. Making art is a balance between indulgence and efficiency. When you make art for yourself, you can take as long as you want. But once money comes in, you start weighing the time you want to take, the time the piece needs, against what you can ask for it.

A detailed ceramic painting of a pastoral scene with a winding dirt path winding around a tree and passing an old stone house

I think about this with the ceramic paintings especially. Some are indulgent—more colors mixed, more careful layering, tiny brushstrokes that hopefully won’t disappear entirely in the kiln. They're a risk every time, and the price has to reflect that. But I also want to make things that are simpler. Still beautiful, but cleaner. Fewer colors, more restraint. A more accessible price point.

The thing is, efficiency in ceramics only goes so far. It's not like illustration, where you slide out a sheet of paper, apply paint, and call it done. Each ceramic painting gets molded and sculpted, then must dry completely before the first fire. Then it's painted—sometimes over multiple sessions. Fired again. Then two different glazes, several layers of each, all painted on because the shape doesn't allow for anything faster—no quick dip and done, no two seconds in a bucket. Fired a third time. No matter how efficient I get with a brush, the forming, the firing, the glazing—it all takes the time it takes.

A simple sketch on a small white bisqueware frame.
A painting of a hillside with sheep in progress on a small bisqueware frame

I meant to have these frames finished and fired weeks ago. Then the snow came, and then my injured knee, and then the revisions.

The ceramic frames I expected to have finished and fired by now are still waiting.

Turns out "the time it takes" includes a lot of things you can’t always account for.

Underglaze vs. Watercolor

I usually only fire my work twice. A first bisque fire to bake the clay enough to glaze, then a final fire to melt the glaze into solid, shiny glass. But when a piece involves detailed painting, I fire it three times.

I rarely do this. An extra bisque uses extra electricity. Sometimes I even paint straight on greenware—unfired clay. But these pieces took so long—a second bisque sets the underglaze so I can apply glaze without risk of smudging. I’ve done this before. A finger brushed against underglaze that was once dry but was dampened by wet glaze. So frustrating!

A second fire also gives me a chance to correct mistakes. Like if the burgundy comes out too streaky, the way it did in my test tile, I can touch it up before sealing it forever under glaze.

Small jars of Amaco Velvet Underglaze

Underglaze is strange. It's like watercolor but also not at all like watercolor. They share the same binder—gum arabic—so you can thin them and mix them the same way. You have to work quickly. Bisqueware absorbs water even faster than cotton rag, each brushstroke disappearing into the clay almost immediately. Wet on wet is next to impossible. And you layer colors the same way, light to dark. You can overpaint light on dark, but when it fires, the dark underpainting bleeds through no matter how many layers you put down. Because the particles move and bleed into the glaze during heating. Because science.

I boldly did a red imprimatura on one of my first ceramic frames, thinking it might show through a little. Oh no. It was a red mess with translucent scenery floating over it. You can see it in the photo below. I eventually put a gold luster rabbit on it and gave it to a friend. Lesson learned.

Glazed and fired ceramic paintings laid out on a work table. One painting is messier and very red compared to the others.

I use high-quality brushes for watercolor—brushes that hold water for long fluid strokes, brushes that keep a fine point. For underglaze I aim for the same, but the clay absorbs water so quickly there's no such thing as a long fluid stroke. And high-quality brushes are useless since the clay particles in the underglaze get trapped in the bristles and sabotage the fine point pretty quickly. I reach for smaller and smaller brushes so that even when they're splayed from clay, they're not too wide.

A small unfired landscape painting in underglaze on a bisque framed canvas. It is surrounded by small jars of underglaze, paintbrushes and a small hand-build watercolor palette.

The biggest difference is how colors change during firing. With watercolor, what you see is what you get. With underglaze, the end result will be much darker. Or sometimes lighter. Sometimes it barely shows up at all. Your carefully planned color theory can fly out the window as soon as the kiln shuts. Science again.

Several landscape paintings on unfired bisqueware.
A few simple glazed and fired ceramic landscape paintings.

I made test tiles. Little pieces of Standard 182 clay with one, two, and three coats of each color. I keep them on my table when I paint, a tiny taste of before and after. It gives me an idea of what to expect, which colors will be reasonably accurate and which will need more care.

Six colorful test tiles in pistachio, straw, light brown, pearl gray, blush, and dark green

We'll see.

Ceramic Paintings

I got into ceramics because I wanted to draw on three-dimensional forms, to make hopefully-beautiful sculptural things for my home. So much of what I do is for other people—commissions for books, cards, gifts, the occasional magazine. These are for me.

Blank white ceramic framed painting that have been bisque-fired and are ready for paint.

Which makes it strange that the project I'm most drawn to is a series of ceramic framed paintings. I take the time to mold three-dimensional canvases just so I can paint on them in two dimensions anyway. But also not strange at all. Few things move me more than an old framed canvas.

A gallery room filled with paintings and objects from the natural world at the Walters Museum in Baltimore.

I love old paintings. The feeling of standing in a museum, surrounded by exquisite art hung salon-style on jewel-toned walls. The Walters in Baltimore does this—grand rooms where paintings and curios are displayed the way they might have been in their time. Light peeking in from tall, shuttered windows. The cabinetry. The quiet. The sense of stepping into a world gone by.

Painting a detailed landscape on the bisque canvases.

These tiny ceramic paintings are an homage to that.

Two underglaze landscape paintings in progress

The latest set is in the kiln now, getting a second bisque fire. I'm hoping the colors warm up without getting muddy—sometimes brown pigment takes over during firing, swallowing the greens and blues I mixed so carefully. I’ll share them when they’re done and we can compare together. I'm hoping the details hold.

Layers of pottery, including a few ceramic framed paintings, in the kiln
A Mushroom Cap and a Jackal Mask
Me and Paul in our paper mache costumes

The idea was to keep it simple. Paul’s never been big on dressing up, but we had a Halloween party to go to, so I figured fancy masks with regular clothes would be a good compromise. A paper mache jackal mask for him, and a mushroom hat for me. Why a mushroom hat? Because I wanted to play with LEDs and I wasn’t sure how to work them into a rabbit mask.

I went to the art store weeks before Halloween because I really couldn't put it off any longer. Bought supplies, but didn’t actually start anything on account of being knocked out with flu and covid vaccines.

When I finally did start, I got to work with sculptural mesh for the first time. It’s like fine chicken wire you can shape and fold.

shaping sculptural mesh

And like chicken wire, the edges are really sharp. It wasn’t long before I put on my gardening gloves. I probably should’ve watched tutorials, but I dove right in, making little origami folds to create the jackal's snout. I shaped the rest of the head and then affixed mesh ears with aluminum wire.

The mesh frame for the jackal mask

Then I made the mushroom cap using bowls to give it shape. I went on intuition, using the part of my brain that's good at form and mechanics. I got the hang of it quickly.

shaping the mushroom mesh

The paper mache came next. I cooked up some paste with flour and water, then used it to adhere torn newspaper strips to the mesh. Very elementary school. The mushroom cap was a breeze.

paste newspaper strips onto the mushroom frame

The jackal was a little tricky around the ears, but I quickly found smaller strips made for smoother corners.

the jackal frame covered in newspaper

It seemed to work fine, but when I painted a coat of white acrylic on the mushroom cap, every crease and buckle showed up. I did some research and discovered I could smooth it with drywall compound. I also learned I could make my own paperclay, which should eliminate the problem altogether, so I’ll try that method next time.

I applied a thin layer of drywall compound to both headpieces, then used a damp washcloth to smooth it down. Once dry, I painted the mushroom cap again. Not perfect but better.

The painted mushroom hat

The jackal mask was still rough, but all the painted details concealed it a bit.

painting over the drywall compound on the jackal mask
painted details on the jackal mask
side view of the jackal mask

For Paul's mask, I wasn't sure about the eye holes. I considered them in the very beginning, but decided it would be safer to add them after everything was formed and painted, and I think that was the right call. I had Paul try it on to figure out where his eyes actually were. Turns out they were right about where the jackal’s eyebrows could be. I used an awl to punch small holes, then shaped them by cutting through the mesh and paper mache with an exacto knife. Added nose holes too, to make it more breathable, though I'm not sure it ever became super comfortable.

munching out eye holes on the jackal mask

But really, it just needed to be wearable for a few minutes at a time. Halloween masks get old quickly when there’s beer at hand.

Paul wearing the jackal mask

The mushroom hat got LEDs. I took the awl and made holes all over the cap, threaded lights through, then capped each one with hot glue. The whole time I was thinking I hope the batteries don’t die before the night is through.

punching holes in the mushroom hat
gluing the LEDs on the mushroom hat

At the base of the mushroom hat, I made a cardboard frame which I covered in chiffon to resemble gills—this part sat on my head, attached to the cap with double-sided carpet tape. Then I added a white chiffon veil to cover my face, and ribbon ties out of old tulle so that it wouldn’t fall off the moment I leaned over.

making the frame for the mushroom gills/headrest
the cardboard frame for the mushroom hat
adding chiffon to the underside of the cardboard frame
the mushroom hat lit up
the mushroom costume in all her glory

At the party, I met a neighbor dressed as a voodoo doll. Her costume was fabulous. Pins sticking out everywhere, full outfit, mismatched shoes, elaborate headpiece. I thought it looked like exactly the amount of work I was trying to avoid. Meanwhile she thought mine sounded like a ton of work because of the paper mache and LEDs.

Her partner came as JP Prewitt—David Duchovny's character from Zoolander. He crafted his homemade hyperbaric chamber from a plastic display dome and an LED strip. He had my vote for the costume contest.

my favorite costume from the party

The world’s greatest hand model. And a pixellated flasher.

He tied for second. I came in third. There were four people tied for second, so take that as you will.

Most people knew I was a mushroom. Some thought I was a samurai. One trick or treater asked if I was an angel. Another asked if I was a forest maiden, which struck me as very funny—forest maiden was in his vernacular. One kid informed me that mushrooms are red. One man said he knew what I was because "I eat a lot of mushrooms."

I'll definitely do more mask making in the future. Maybe not until next halloween, but certainly at some point. It’s always nice to have an excuse to play with a different medium. Working with sculptural mesh felt inspiring in a way I didn't expect, despite the fact that I now know what they mean by “death from a thousand paper cuts.” And there's something satisfying about making costumes that are fully one-of-a-kind, even if they're a little uncomfortable and take too long and some kid thinks you're a samurai.

hanging out on the back deck

One of the people who tied for second was at another party I went to on Saturday. It was nice to have that connection, to recognize each other from the Halloween party. Small neighborhood moments like that are why you spend weeks making a mushroom hat in the first place.